
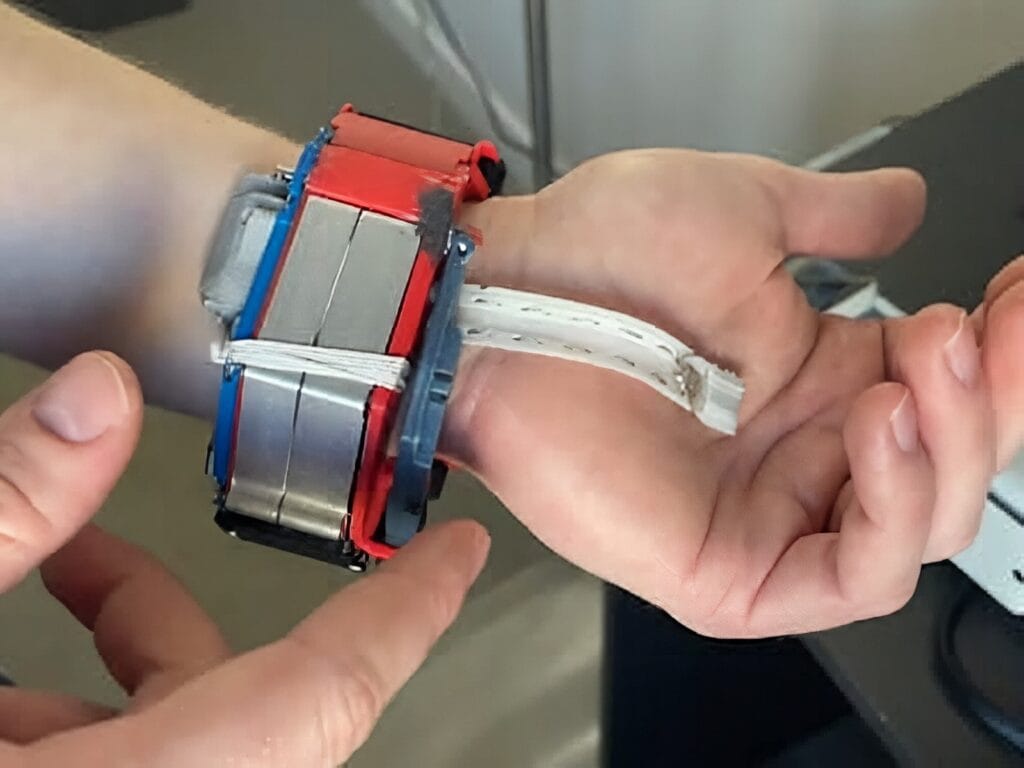
Ever wished you could shoot webs like Spider-Man with a quick flick of your wrist? One maker just got dramatically closer to that fantasy with a slim, electronics-packed bracelet that finally looks the part.
The project, called WEB (short for Wrist Ejection Bracelet), comes from creator Will van den Bogert of the YouTube channel “the. Amazing, PhD.” His latest prototype shrinks earlier bulky versions into a sleek wearable that sits just 13mm off the wrist while still firing pressurized “web” fluid on command.
What’s inside the bracelet
At the heart of the design is a custom printed circuit board built around a Microchip ATSAMD21 microcontroller. A TC1508A motor driver handles two tiny motors: one opens a valve to release pressurized fluid, and the other resets a retractable trigger after each shot. A small NeoPixel LED gives visual status feedback, and a force-sensitive resistor embedded in a flexible TPU trigger detects finger pressure.
Power comes from a compact 3.7V lithium battery with onboard charging and regulation circuits. A single USB-C port handles both charging and firmware uploads, keeping the housing clean. The team even swapped traditional springs for magnetic ones to save internal space, and a machined pressure vessel inside the bracelet is rated to roughly 100 PSI for solid web-shooting force.
Smart engineering touches
Will’s approach focused on stripping out anything non-essential and rebalancing mechanical leverage so fragile plastic parts wouldn’t crack under pressure. The case is mostly 3D printed in PET-G for toughness, with flexible TPU on the trigger for comfort. On the software side, a custom Serial Wire Debug (SWD) bootloader lets him reprogram boards through a soldering-free jig, and non-volatile flash memory means the bracelet remembers its state between uses.
Build it yourself
Want to try a wearable maker project of your own? You can pull off something similar with parts from Circuitrocks. A compact Arduino Nano, Raspberry Pi Pico, or ESP32 dev board can replace the ATSAMD21 for prototyping. Add a small motor driver, a few coreless or SG90 micro servo motors, a NeoPixel LED, and a force-sensitive resistor or tactile button for the trigger. Toss in a LiPo battery, a USB-C charger module, and 3D print a housing that hugs your wrist.
It’s a fantastic weekend build that blends mechatronics, PCB design, and a healthy dose of comic-book fun. Just maybe don’t try swinging between buildings.
Frequently Asked Questions
Why use a Microchip ATSAMD21 instead of an ATmega328 (Arduino Nano) for a wearable like this?
The ATSAMD21 is a 32-bit Cortex-M0+ running at 48 MHz with native USB, so it can sample the force-sensitive resistor, drive the TC1508A motor driver, and update the NeoPixel without breaking a sweat — and it shows up to your computer as a USB device for firmware updates without an extra serial chip. An ATmega328 would work for the basic logic but is tight on flash and lacks native USB, which would mean a bulkier board.
How does the force-sensitive resistor (FSR) work as the trigger here?
An FSR is basically a thin polymer sandwich whose resistance drops the harder you press it. You wire it as a voltage divider with a fixed resistor (10 kΩ–100 kΩ is typical) and read the divider with the microcontroller’s ADC. In this build the ATSAMD21 samples the FSR and fires the valve motor only when the reading crosses a threshold, which prevents accidental triggers.
What will I learn building a wrist-mounted gadget like the WEB bracelet?
You’ll touch designing a custom PCB around an SAMD21, driving brushed DC motors with an H-bridge (TC1508A), reading analog sensors with ADC, addressing NeoPixels over a single data line, and sequencing all of that with non-blocking firmware. On the mechanical side you’ll learn dual-material 3D printing (rigid PETG plus flexible TPU), magnetic spring design, and packaging electronics into a tight wearable form factor.
