
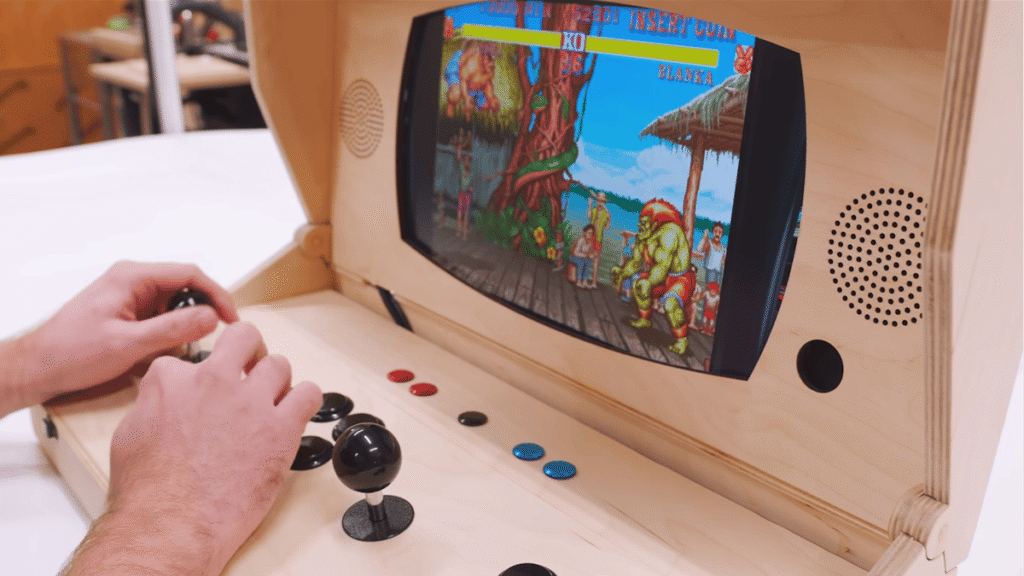
Picture a beach house on a rainy long weekend. Someone sets a plain wooden briefcase on the dining table, flips two latches, and lifts the lid. A 15.6-inch screen rises up, two joysticks and twelve fat arcade buttons appear underneath, and five minutes later the whole barkada is fighting over who gets player one in Street Fighter II. That is the build maker Michael Alm showed off on Hackster: a full two-player arcade cabinet that closes like luggage and carries by a handle.
What he built
The brain is a Raspberry Pi 3 Model B+ running Batocera, a Linux distro made for emulation that boots straight into a game menu with no desktop in the way. The 1.4 GHz quad-core Pi handles 8-bit and 16-bit arcade titles comfortably, which covers most of what anyone wants on a trip. The upper half of the case holds the LCD; the lower half is a sloped control deck with a Sanwa joystick and six Sanwa buttons per player in the Vewlix layout, the same button curve found on Japanese candy cabinets. Extra buttons cover coin, start and menu navigation. Fold the lid down and the screen sits flat over the controls.
How he built it
Wiring is the part a student team can copy directly. All 20-odd inputs run to an Ultimarc I-PAC 2, a keyboard-encoder board that shows up on the Pi as a USB keyboard, so Batocera sees joystick-left as a keypress and no custom driver is needed. Each button and microswitch is a simple normally-open contact between its input pin and the I-PAC’s common ground; the board supplies its own pull-ups and handles debounce. The enclosure panels were drawn in Illustrator and laser-cut from Baltic birch plywood, with recesses routed into the control panel so the 30 mm buttons snap in flush. The control deck tilts up at 7.5 degrees for wrist comfort.
The tricky bit was the hinge. Off-the-shelf hinges put the pivot at the edge, and the joystick shafts would have smashed into the screen on closing. Alm made his own: short lengths of hollow brass tubing epoxied into the side panels, with a solid brass rod sliding through as the pin. Moving the pivot inboard gave the sticks the clearance they needed and hid the hardware inside the wood.
- A Pi 3 B+ wants a solid 5 V 2.5 A supply; an undersized phone charger throws the lightning-bolt undervoltage icon mid-game.
- Daisy-chain the button grounds with one continuous wire rather than running 20 separate returns to the encoder.
- Measure stick throw before cutting the lid: a Sanwa JLF stands about 24 mm above the panel at full deflection.
Takeaway
Nothing here needs a custom PCB or firmware. The Pi, an encoder, a box of switches and some careful woodworking produce a machine people line up to play, which is exactly the kind of crowd-pulling demo a robotics club wants at a school fair. A Raspberry Pi 4 or 5 from circuit.rocks will run the same Batocera image with more headroom; pair it with generic 30 mm arcade buttons and a zero-delay USB encoder (around PHP 300) if the I-PAC 2 is out of budget. Start by flashing Batocera to a microSD card, wire one joystick on a breadboard, and get Pac-Man moving before any plywood gets cut.
Frequently Asked Questions
How do the arcade buttons talk to the Raspberry Pi in this build?
Through an Ultimarc I-PAC 2 keyboard encoder. Every joystick direction and button is a normally-open switch to the encoder’s common ground, and the board presents itself to the Pi as a USB keyboard, so Batocera reads each input as a keypress with no extra drivers.
What parts and skills does a briefcase arcade need?
A Raspberry Pi 3 B+ or newer, a 15.6-inch LCD with HDMI, two joysticks, 12 to 16 arcade buttons, a USB encoder, a 5 V 2.5 A supply and a plywood enclosure. You need basic wiring and crimping, a way to cut panels (laser cutter, CNC or careful hand tools) and some patience designing a hinge that clears the sticks.
What will I learn if I build this?
Setting up a Linux-based Pi image from scratch, mapping switch inputs through a USB HID encoder, power budgeting for single-board computers, and designing an enclosure around real component dimensions. The same input-mapping and power lessons carry over to robotics control panels and kiosk projects.
