
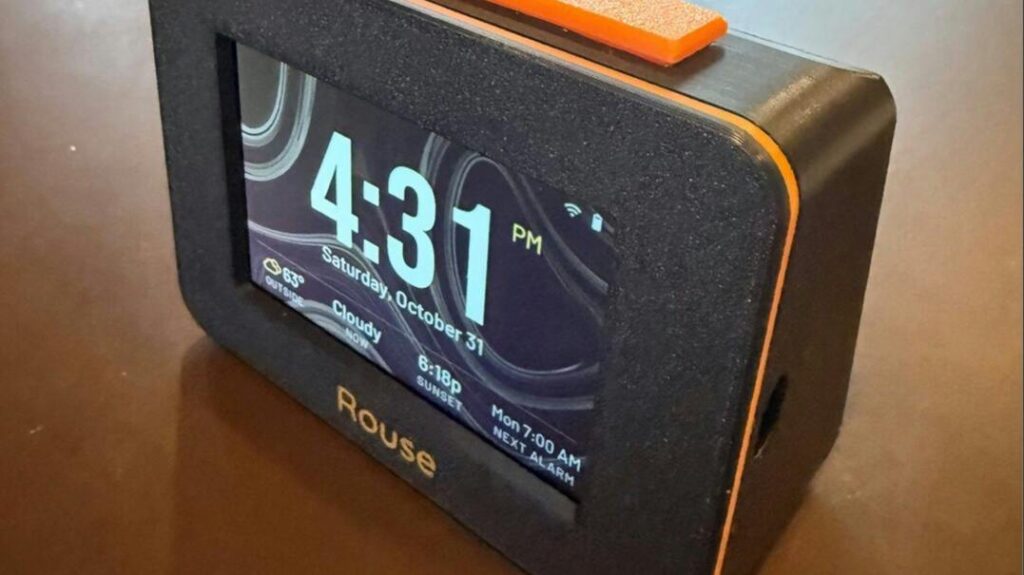
What if the thing that wakes you up had no app, no account and no feed to scroll at 1 AM? That is the whole pitch behind Rouse, a bedside alarm clock you assemble yourself around an ESP32 touchscreen board, featured on Hackster. It does the job of a phone alarm without the phone, and the firmware is free.
What does Rouse actually do?
The clock runs on a 3.5-inch touchscreen and handles up to 10 separate alarms, each with its own schedule, sound, volume and snooze length. A sunrise mode ramps the backlight up before the buzzer starts, the volume climbs gradually, and an extra-loud setting exists for people who sleep through everything. A snooze bar on top of the case is wired to two tactile switches: tap it to snooze, hold it to stop. After dark the screen dims and shifts to a deep red theme so it does not light up the room. You also get weather, sunrise and sunset times, built-in sleep sounds like rain and white noise, and custom backgrounds including your own photos. Everything is set through a web page served from the clock itself on your LAN, so there is no cloud account anywhere.
Which board do you need, and how is it wired?
Rouse supports three off-the-shelf displays: the Freenove FNK0104N, the Waveshare ESP32-S3-Touch-LCD-3.5, and the budget “Cheap Yellow Display” CYD E32R35T. The first two use an ESP32-S3, which brings USB OTG and more PSRAM for the photo backgrounds; the CYD runs the original dual-core ESP32 at 240 MHz and is the one most of us already have in a drawer. Wiring on the Freenove and CYD builds is light: a small 8 ohm speaker on the amplifier output, two momentary switches to spare GPIO pins for the snooze bar, and an optional single-cell 3.7 V LiPo so a brownout does not kill your morning alarm. The Waveshare board skips the switches entirely and uses its onboard IMU to detect a tap on the enclosure. The housing is 3D-printed from the project’s files, but the electronics side is the interesting part. Firmware goes on through a browser-based flasher over USB, so there is no toolchain to install; the first boot opens a Wi-Fi setup page, you join your network, and the clock is live.
- Pull-ups matter: tactile switches to GPIO need INPUT_PULLUP enabled or a 10 kΩ resistor, otherwise snooze fires at random.
- Keep speaker wires short. Long leads next to the display ribbon add audible hum on the CYD.
- If the LiPo is included, confirm the board has a charge circuit. The CYD does not, so you would add a TP4056 module.
Try it
A CYD E32R35T sells for well under PHP 1,000 and the rest of the parts are a speaker, two switches and jumper wire, which makes Rouse a one-afternoon build and a sane first ESP32-S3 project for a dorm room. Grab the firmware and build guide linked from the Hackster write-up above, flash a board you already own, and use the web UI to set your 6 AM alarm before you even print the case. If you want a thesis angle, log how often the snooze bar gets pressed and push that over MQTT to a dashboard.
Frequently Asked Questions
Which ESP32 boards does Rouse run on?
How much wiring and what skills does it take?
Very little: a small speaker, two tactile switches for the snooze bar and an optional LiPo. The Waveshare version needs no extra wiring at all. Firmware flashes from a browser over USB, so you only need basic soldering and a Wi-Fi network, no IDE setup.
What will I learn if I build this?
You get hands-on with ESP32-S3 touchscreen boards, GPIO inputs with pull-ups and debouncing, audio output from a microcontroller, web-based device configuration on a local network, and battery backup with a LiPo. These are the same building blocks used in IoT capstone and smart-home projects.
