
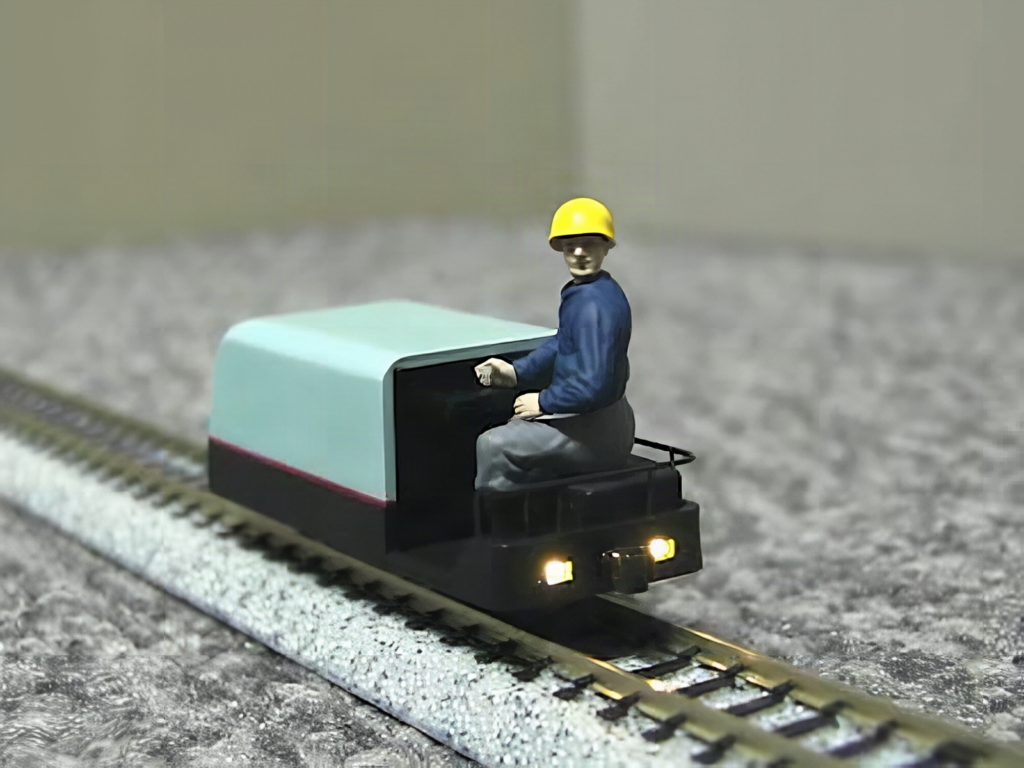
The little blue locomotive creeps toward the end of its track, slows, stops, and sits for a beat. A tiny driver in a yellow hard hat stares ahead. Then the headlights swap to taillights, the motor hums in reverse, and it glides back the way it came. Nobody touched a controller.
That scene comes from a build by the Japanese modeler known as diorama111, featured on Hackster. At 1/48 scale (roughly O gauge), a narrow-gauge battery locomotive is only a few centimeters long, yet this one carries its own power supply, motor driver, lighting, and an infrared receiver.
What they built
A self-running shuttle locomotive. The track tells the train where it is, and the train decides what to do about it. Instead of wiring the rails with reversing sections and relays, the builder moved the logic onboard and kept the trackside hardware simple: a few optical sensors and IR LEDs.
How they built it
- Drivetrain: one coreless motor spins a central shaft with two worm gears. Each worm meshes with a spur gear on an axle, so a single motor drives both wheelsets. Worm gears also give a big reduction ratio, which means slow, realistic crawling speeds.
- Power: a 3.0 V supercapacitor instead of a lithium cell. As the cap discharges, its voltage drops fast, so a small DC-DC step-up (boost) converter holds the rail steady for the motor and control board.
- Wiring: the supercap, boost converter, custom controller, and IR receiver sit on one deck above the gears, linked with thin magnet wire. Soldering enamelled wire at this size is tricky; you have to burn or scrape the coating off each end first.
- Sensing: photoreflectors along the track detect the loco passing specific points, and nearby IR LEDs signal the receiver. The controller then ramps the motor PWM down, pauses, reverses direction, and ramps back up.
- Lighting: white headlights and red taillights flip with the direction of travel, driven from the same direction signal as the motor.
The takeaway for your own build
The clever part is the split of responsibilities. Dumb, cheap sensors on the track; smart behavior on the vehicle. That same pattern works for line-following robots, warehouse carts in a capstone project, or an automated demo layout for a school exhibit. If you want to try it at a bigger scale, a TCRT5000 reflective sensor module on a breadboard, an ATtiny85 or Arduino Nano reading it on one GPIO pin, and a DRV8833 H-bridge driving a 6 V N20 gear motor will reproduce the stop-wait-reverse logic in an afternoon. Add a 2.7 V, 10 F supercap with a boost module and you can test how many seconds of run time you actually get before the voltage sags.
Start with the acceleration curve in code: step the PWM duty cycle by 5% every 50 ms and the stop will look far less toy-like. Watch the builder’s video on the Hackster write-up to see how smooth that ramp looks at full speed.
Frequently Asked Questions
How does the locomotive know when to stop and reverse?
Photoreflectors placed along the track detect the locomotive at set points, and nearby infrared LEDs send a signal to the IR receiver on board. The onboard controller then slows the motor, pauses, reverses direction, and accelerates again.
Why use a supercapacitor instead of a battery?
A supercapacitor is small, charges in seconds, and tolerates many charge cycles. Its voltage drops as it discharges, so the build adds a DC-DC step-up converter to keep the motor and control board supplied with a steady voltage.
What will I learn if I build something like this?
You’ll practice PWM motor control with smooth acceleration ramps, reading reflective IR sensors on a GPIO pin, using an H-bridge to reverse a DC motor, and working with supercapacitors and boost converters. You’ll also get hands-on with fine soldering and gear reduction, skills that carry over to line-following robots and thesis projects.
