
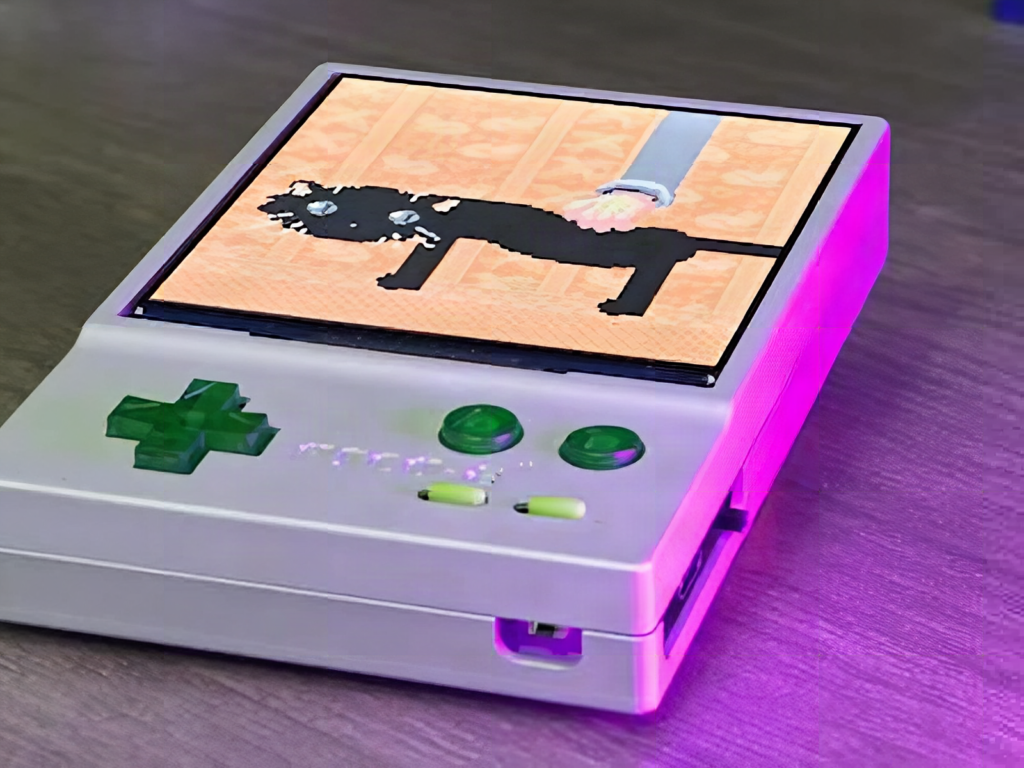
Picture a hardware lab at 9 PM. Someone has a PICO-8 game running in a browser tab, and the whole thesis group has stopped soldering to crowd around a laptop and argue over whose turn it is. That is roughly the itch UncleStem scratched when he built a handheld made for one job: playing PICO-8 carts in your hand instead of in Chrome.
What he built
PICO-8 is a “fantasy console” by Joseph White, released in 2015. It renders a 128×128 pixel screen with a 16-color palette, and its games are small Lua programs anyone can read and remix. UncleStem’s handheld matches that square format with a 720×720 IPS LCD, so there are no black bars eating half the panel. Controls are a d-pad, two action buttons, plus start and select. PICO-8 only needs the first six inputs, but the extra two handle system menus and happen to mirror an NES pad if you want to run emulators too.
How it comes together
The brain is a Raspberry Pi Zero 2 W: a quad-core 1 GHz Arm Cortex-A53 with 512 MB of RAM. That is overkill for PICO-8, which is exactly why NES and Sega Genesis emulation also fit. A single 18650 lithium cell supplies power. It sits around 3.7 V nominal, so plan on a charger and a 5 V boost stage between the cell and the Pi. Everything connects through a custom PCB that UncleStem ordered from JLCPCB with full-color silkscreen, even though it hides inside the case.
The enclosure went through several printed prototypes before the final version was CNC-milled from aluminum with a satin finish. The back leaves the Pi exposed, so swapping the microSD card does not need a screwdriver. A printed shell works fine if aluminum is out of budget.
One gotcha if you copy the design: 720 divided by 128 is 5.625, not a whole number. Run PICO-8 at 5x scale (640×640) with a thin border if you want crisp pixels, or accept a little blur from fractional scaling. Buttons usually wire straight to GPIO pins with internal pull-ups enabled, so check the PCB netlist before you solder anything to a breadboard mockup.
The takeaway
This build shows how far one well-chosen constraint can carry a project. The square screen, the six buttons and the single battery all follow from what PICO-8 actually needs. For a capstone or hackathon team, that is a useful habit: pick the software first, then size the hardware around it. Read the original write-up on Hackster, grab a PICO-8 license from Lexaloffle, and start with a Pi Zero 2 W, a spare 18650 holder and eight tactile switches on a breadboard.
Frequently Asked Questions
Why does this handheld use a square 720×720 screen?
PICO-8 renders a square 128×128 display, so a square panel avoids black bars. Running at 5x scale (640×640) with a thin border keeps pixels crisp, since 720 is not a whole multiple of 128.
Is the Raspberry Pi Zero 2 W powerful enough for this?
Yes, with room to spare. Its 1 GHz quad-core Cortex-A53 and 512 MB of RAM run PICO-8 easily and also handle NES and Sega Genesis emulation. Power comes from one 18650 cell through a charger and 5 V boost stage.
What will I learn if I build this?
You’ll practice wiring buttons to GPIO with pull-ups, designing and ordering a custom PCB, handling lithium-cell charging and 5 V boost conversion, configuring Linux on a Pi, and matching hardware choices to a software target, a useful skill for capstone projects.
