
Fibonacci Day: 1, 1, 2, 3 Ways to Turn Math into Maker Projects
Every November 23, the world quietly celebrates Fibonacci Day (11/23) because the digits
match the start of the Fibonacci sequence: 1, 1, 2, 3. It’s the perfect excuse to mix
math, art, and electronics — especially if you love tinkering with Arduino, ESP32, or Raspberry Pi.
In this post, we’ll take a quick tour of what Fibonacci is, why the date is special, and then jump into Fibonacci-inspired project ideas you can build using parts from
circuit.rocks. Ideal for students, teachers, and makers in the Philippines who want to turn a math concept into a real, blinking, glowing project.
What Is the Fibonacci Sequence?
The Fibonacci sequence is a list of numbers where each term is the sum of the two before it:
1, 1, 2, 3, 5, 8, 13, 21, 34, 55, 89, 144…
Formally, it’s often written like this:
- F(0) = 0
- F(1) = 1
- F(n) = F(n − 1) + F(n − 2)
This simple rule pops up everywhere: in sunflower seed patterns, pinecones, shells, tree branches,
music, and designs that follow the golden ratio. That’s why Fibonacci is such a
fun bridge between math and the real world.
Why November 23 Is Fibonacci Day
Fibonacci Day is celebrated on November 23 (11/23). Read that date as 1, 1, 2, 3 — the first
four non-zero terms of the Fibonacci sequence. It’s a small, geeky holiday, but it’s great for:
- Introducing sequences and patterns in a fun way
- Showing how math appears in nature and design
- Running quick “math + electronics” builds in the lab or classroom
If you want to showcase Fibonacci visually, displays and LEDs are your best friends. You’ll find plenty in the
Displays collection
at circuit.rocks — from tiny OLEDs to numeric LED modules, all ready for Arduino, ESP32, or Raspberry Pi projects.
Fibonacci Day Project Ideas You Can Build
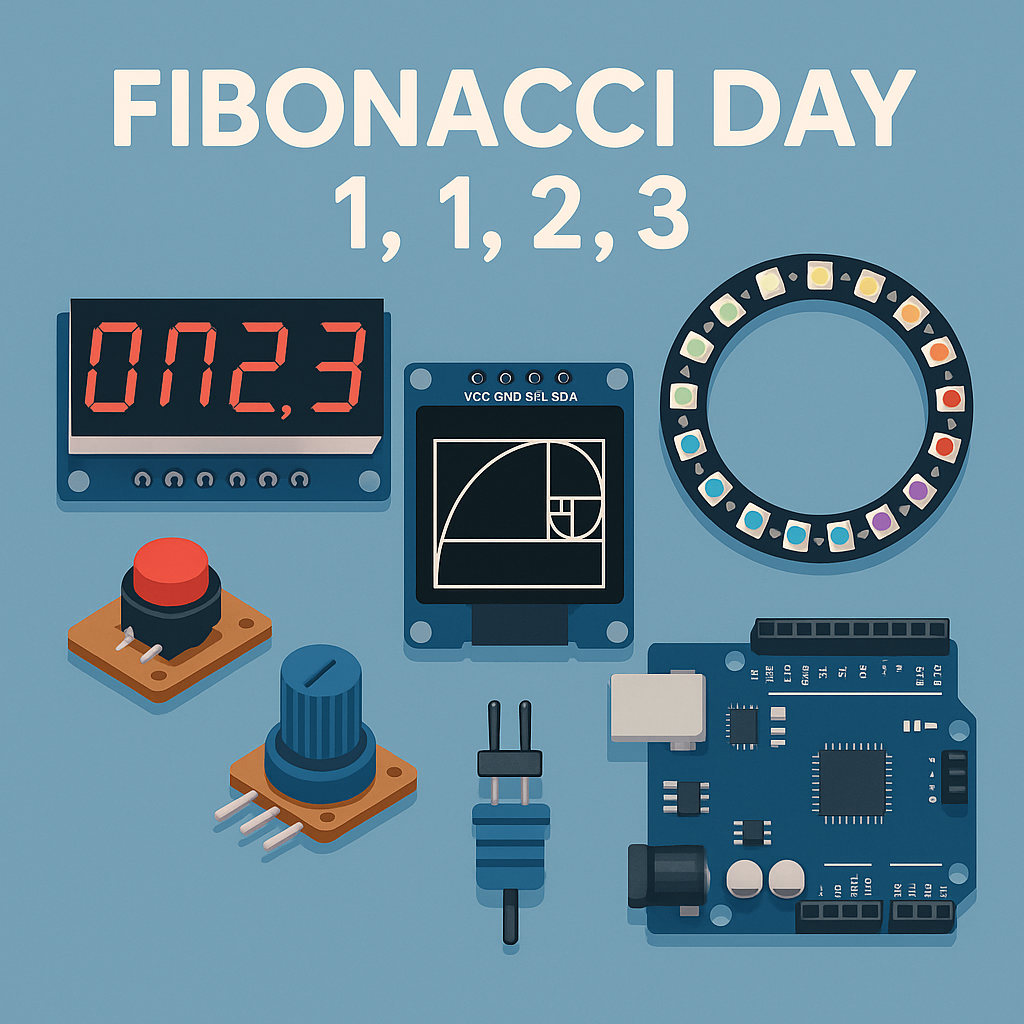
1. Fibonacci Counter Using 7-Segment Displays
Instead of counting 1, 2, 3, 4… why not let your project count
1, 1, 2, 3, 5, 8, 13, 21… on a seven-segment display? It’s a simple way to turn an
abstract sequence into a blinking, real-time demo.
You can start with basic numeric displays like:
- Single digit:
Numeric Single Digit Display 0.56 Red Common Cathode - Four digits:
Four Digit Numeric Display 0.56 Red Common Anode
Pair them with any Arduino-style board, like those from the Arduino-Compatible Boards collection, and display the Fibonacci sequence step by step. Ask students
to predict the next number before the display updates — instant math quiz.
2. Fibonacci Spirals with NeoPixel Rings
Fibonacci is famous for its spirals, especially in nature (shells, sunflowers). You can imitate that by lighting up
addressable RGB LEDs in patterns that grow according to Fibonacci numbers.
A nice starting point is a circular LED ring like:
You can chain multiple rings or mix in other WS2812-based LEDs for a bigger “Fibonacci flower.” For example:
- Light 1 LED, then 1, then 2, then 3, 5, 8, 13, and so on.
- Arrange LEDs in a spiral and turn them on following Fibonacci positions.
- Fade colors or brightness based on where you are in the sequence.
It’s a beautiful visual — perfect for a classroom demo, TikTok content, or a small STEM exhibit.
3. Golden Ratio Visualizer on OLED
The ratio of consecutive Fibonacci numbers (Fn+1 / Fn) approaches the
golden ratio (~1.618). You can show this convergence on a tiny graphic display:
bar graphs, rectangles, or simple charts that change as you move through the sequence.
Great display options from circuit.rocks include:
Using an Arduino or ESP32, you can:
- Print each Fibonacci number on the screen as it’s generated
- Draw bars whose lengths follow Fibonacci values
- Show the current ratio Fn+1 / Fn getting closer and closer to 1.618
Frequently Asked Questions
Why is November 23 Fibonacci Day?
The date 11/23 reads as 1, 1, 2, 3 — the first four non-zero terms of the Fibonacci sequence.
What is the Fibonacci sequence?
A list where each number is the sum of the two before it: 1, 1, 2, 3, 5, 8, 13, 21, 34, 55. The pattern shows up in sunflower seeds, pinecones, shells, music, and the golden ratio.
What Fibonacci-themed Arduino project can I build?
A Fibonacci counter using a 7-segment display that shows 1, 1, 2, 3, 5, 8, 13, 21 instead of plain counting. Pair a numeric LED display with any Arduino-compatible board and update the values step by step.
How can NeoPixels show Fibonacci patterns?
Light up addressable RGB LEDs in spirals that grow according to Fibonacci numbers. A NeoPixel Ring with 12 RGBW LEDs is a good starting point for the spiral pattern seen in shells and sunflowers.