
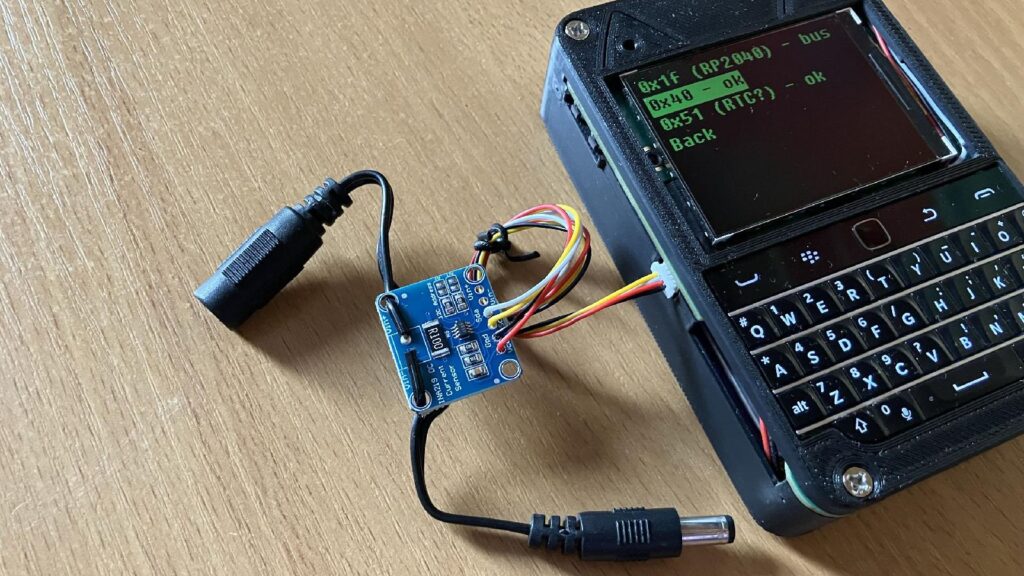
Your weekend hack this time is not a gadget. It is a habit: retrofit a Qwiic port onto every I2C breakout, dev board and half-finished thesis prototype on your bench, so next semester’s wiring takes seconds instead of a breadboard full of jumper spaghetti. A Hackaday piece by Arya Voronova makes the case after years of putting the connector on everything she designs, and the argument holds up well for a school robotics lab.
What the Hackaday author actually built
Qwiic is SparkFun’s standard for 3.3 V I2C on a 4-pin JST-SH connector with 1.00 mm pitch: GND, 3.3 V, SDA, SCL. The author started adding one footprint to every custom PCB simply as a spare expansion slot, then found it doubles as a logic analyzer tap. When an I2C sensor misbehaves, plug a splitter in, open PulseView, and watch the bus directly. On a solar Meshtastic node, an INA219 current monitor connected to a Heltec board over a single Qwiic cable, which let the team scan the I2C addresses on a nearby Raspberry Pi before touching the Meshtastic firmware. The same connector even got repurposed for USB, with SDA carrying D+ and SCL carrying D-, since both buses use 3.3 V signaling.
Parts and cost reality
- JST-SH 4-pin SMD sockets (SM04B-SRSS-TB). Clones from LCSC cost a handful of pesos each, and the KiCad footprint ships in the default library: JST_SH_SM04B-SRSS-TB_1x04-1MP_P1.00mm_Horizontal.
- Single-ended JST-SH pigtails, 20 cm long. The author bought 100 at once and solders the bare end straight onto any breakout that lacks a port.
- A Qwiic-equipped host to plug into. Many ESP32-S3 and RP2040 dev boards now ship with the socket, as do the Arduino Uno Q and recent Adafruit Feathers (under the STEMMA QT name, same connector).
Gotchas: the vertical and horizontal JST-SH variants have mirrored pinouts, so check the datasheet before ordering 50 boards. The author once hot-glued a batch of vertical ports shut at a workshop after getting that wrong. The 4-pin layout also has no interrupt line, so a sensor that truly needs INT still wants one extra wire. Pull-up resistors (4.7 kΩ is the usual pick) live on the host board, not the cable, and most breakouts already carry their own, so watch for stacked pull-ups when daisy-chaining 3 or more devices.
Spend your Sunday on this
Pick the five I2C modules your team uses most, likely an OLED, a BME280, an MPU6050, a PCA9685 servo driver and an ADS1115 ADC. Solder a pigtail to each, label the address on tape, and build one tiny splitter board with three sockets in parallel. By Monday, a student can swap a sensor on the competition robot without a soldering iron. Read the full argument, including the USB-over-Qwiic trick, at hackaday.com, and grab the connector spec at sparkfun.com/qwiic.
Frequently Asked Questions
What exactly is a Qwiic connector?
Qwiic is SparkFun’s convention for putting 3.3 V I2C on a 4-pin JST-SH connector with 1.00 mm pitch, wired GND, 3.3 V, SDA, SCL. Adafruit’s STEMMA QT uses the same connector and pinout, so cables and boards from both ecosystems interchange.
Can I add Qwiic to a sensor board that does not have it?
Yes. Solder a single-ended JST-SH pigtail to the board’s GND, 3V3, SDA and SCL pads, or mount a small JST-SH socket breakout beside it. Keep the host’s pull-up resistors in mind, since many breakouts already include their own 4.7 kΩ or 10 kΩ pull-ups.
What will I learn if I build this?
You will practice I2C fundamentals: scanning a bus for addresses, setting ADDR pins, understanding why pull-ups matter, and reading SDA/SCL traffic on a logic analyzer. You will also pick connector footprints in KiCad and learn why pinout orientation on vertical versus horizontal parts deserves a datasheet check.
