
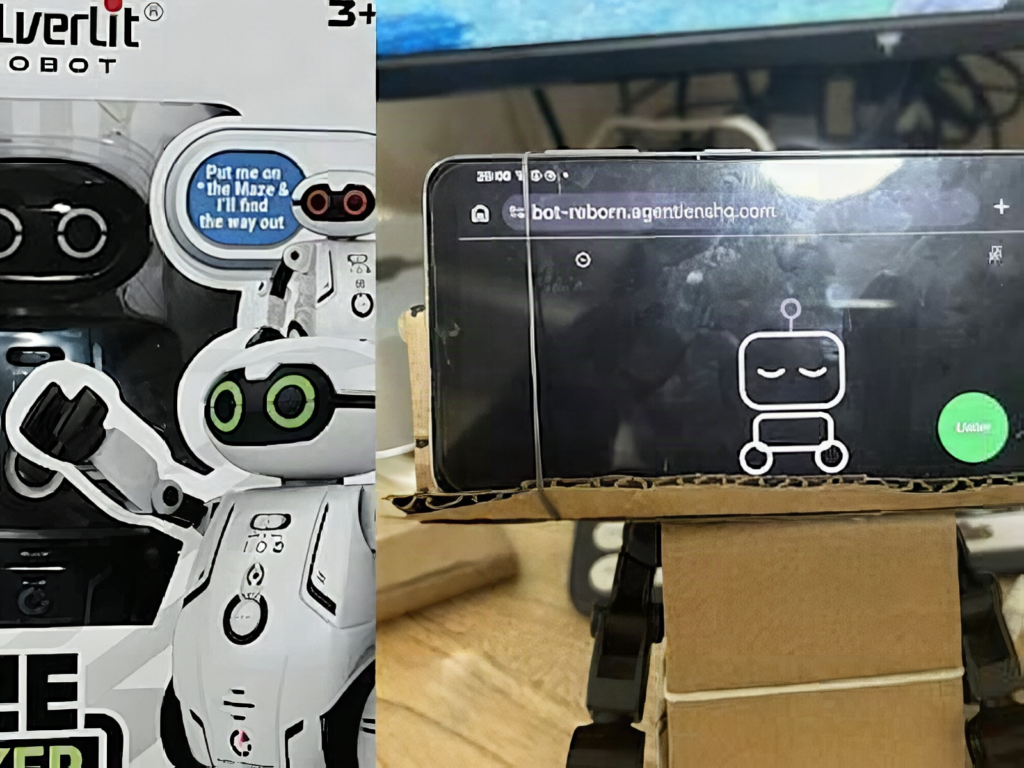
Start with a Silverlit Maze Breaker toy robot (about $4), a USB FT232H GPIO breakout, a soldering iron, and an Android phone that can run Chrome. That is the whole parts list behind Bot Reborn, a hack by maker Asten that turns a line-following toy into a robot that listens, talks, and drives on voice commands. The Hackster writeup covers the full build.
What the hack does
The stock toy is simple: one DC motor drives the tracks, and an electromagnet nudges an armature left or right for steering. Two driver chips run those parts, each with two control inputs, so four wires give you complete control. Asten cut one PCB trace, soldered leads to the driver inputs, and wired them to the FT232H. The phone talks to that board through Chrome’s WebUSB, shows an animated face on its screen, and supplies the microphone and speaker. A Node.js server on the same Wi-Fi network handles speech recognition, chat replies, and motor commands.
The technical trick: a tiny model for reflexes
Waiting several seconds for a large language model to understand “stop” is a bad idea when the robot is heading for a wall. So Asten fine-tuned a Qwen3.5-0.8B model that only classifies speech into forward, backward, left, right, stop, or keep going. Training took about 30 minutes on a free Google Colab GPU with 490 examples, and it scored 86.6% on 164 held-out examples. On a Mac mini M4 it answers in roughly 200 ms, and a command only runs when confidence passes 80%. Anything that is not a movement goes to a bigger chat model.
The gotcha is weight: the phone is heavy enough to tip the robot over when it reverses. Asten is moving to an ESP32-S3 with an INMP441 I2S microphone and a MAX98357A amplifier, which already streams audio over Wi-Fi.
Try the same idea
You do not need the exact toy. Any cheap motorized toy with two or three drive inputs works: probe the board with a multimeter, find the motor driver pins, and drive them from an ESP32 GPIO through a logic-level check at 3.3 V. For a school robotics club, the intent-classifier idea is the reusable part. Source code, dataset, and model are public through the writeup above.
- Use a pull-down resistor (10 kOhm) on each control wire so the motor stays off while the board boots.
- Gate every command on a confidence threshold, as Asten does at 80%.
- Browse ESP32 boards and I2S modules at circuit.rocks.
Frequently Asked Questions
How does Bot Reborn control the toy’s motors?
Asten soldered wires to the two motor and steering driver inputs, four control signals in total, and connected them to an FT232H USB-to-GPIO board that an Android phone drives through Chrome WebUSB.
What does it cost and what skills do I need?
The toy costs about $4, plus an FT232H breakout and a phone. You need basic soldering, a multimeter to find driver pins, and comfort running a small Node.js server.
What will I learn if I build this?
You practice reverse-engineering a motor driver, GPIO control over USB, fine-tuning a small classifier on free Colab, and setting confidence thresholds, all useful for a robotics thesis or school competition.
