
What holds a handheld console together once you skip both the PCB and the printed enclosure?
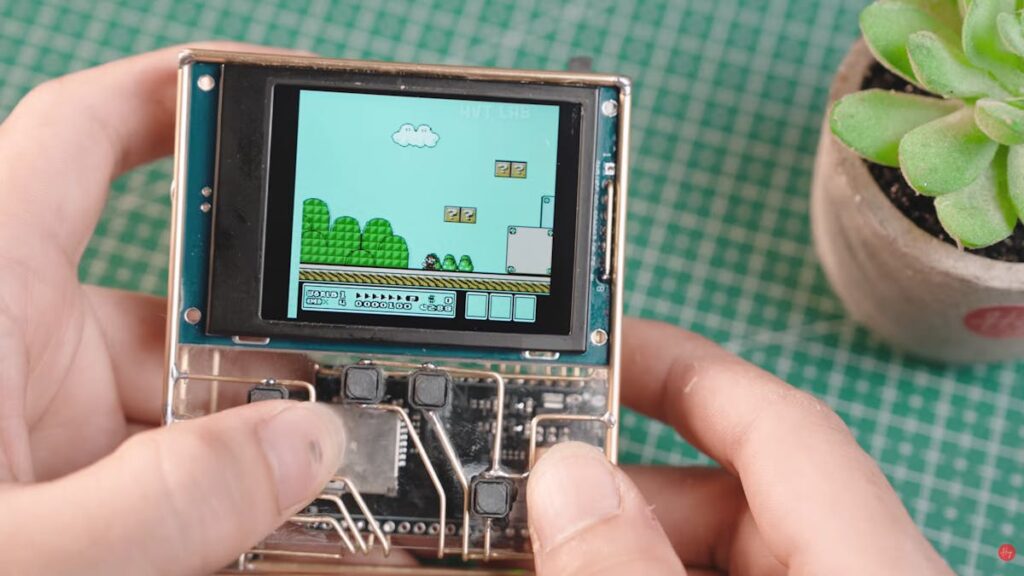
Huy Vector’s answer was 2 mm hollow brass tubing. He traced the outline of a 2.4-inch IPS display onto paper, bent tubing into matching front and back rectangles, then joined the two with four 8 cm corner posts. The skeleton that came out of it carries a display, a speaker, a battery pack and a dev board with almost nothing hidden. Every solder joint is on show, and that is the point.
The frame is part of the circuit
Brass conducts, so Vector let the tubing double as the common ground for everything bolted to it. That removes a fistful of return wires and gives him a ground reference he can tap anywhere on the chassis. The rest of the wiring is stiff 1 mm brass wire run point to point, which is stiff enough to hold its shape and act as structure in its own right. A thin speaker tucks directly under the display inside the front frame.
What is actually running the games
The brains are an ESP32-S3 N16R8 CAM development board, picked less for its camera (unused here) than for the 16 MB of flash, 8 MB of PSRAM and the onboard microSD slot that holds the ROMs on a FAT-formatted card. There was no room for an off-the-shelf gamepad, so the controls are eight 4 mm tactile switches mounted to a 2 mm acrylic sheet: D-pad, two action buttons, Start and Select. Each switch shares the chassis ground, with its second terminal running to its own GPIO pin. A small amplifier drives the speaker, and three 3.7 V AAA-sized rechargeable cells sit in the open frame next to a USB-C charging module and a slide power switch.
On the firmware side it emulates the NES, Game Boy, Game Boy Color, Sega Master System and Game Gear. A menu behind Start and Select exposes volume, visual filters, save states and ESP32 overclocking, and the S3’s Wi-Fi means new ROMs can be pushed across without pulling the card.
Try it
The brass is the hard part; the electronics are not. An ESP32-S3 board, a 2.4-inch SPI display, a handful of tactile switches and a mono amp will get you a working emulator on a breadboard in an afternoon, and you can decide on a body later. One gotcha if you go the metal-chassis route: a conductive frame is a great ground, but it will also short anything you let touch it, so sleeve or standoff every exposed pad before you power up. Full build photos and the video are on Hackster.
Frequently Asked Questions
Which board runs this brass handheld?
An ESP32-S3 N16R8 CAM development board. The camera goes unused; it was chosen for the 16 MB flash, 8 MB PSRAM and the onboard microSD slot that stores the game ROMs on a FAT-formatted card. Wi-Fi on the S3 also lets new ROMs be sent over without removing the card.
Why use brass tubing instead of a 3D-printed case?
Two reasons. The 2 mm tubing is rigid enough to carry the display, speaker, cells and board without a shell, and because brass conducts, the frame doubles as a common ground for every component mounted on it. That removes a lot of return wiring, though it also means any exposed pad touching the chassis will short.
What will I learn if I build this?
Point-to-point wiring without a PCB, reading GPIO from a matrix of tactile switches, driving an SPI display and a mono audio amp from a single microcontroller, and managing a Li-ion pack with a USB-C charging module. You also pick up the mechanical side: grounding strategy, strain relief and keeping conductive structure from shorting your circuit.
