
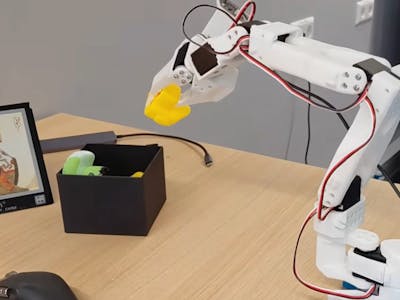
A robot arm picking up rubber ducks does not sound like a milestone until you notice that nothing in the loop is talking to a server. Dmitry Maslov of Hardware.ai bolted Arduino’s new VENTUNO Q onto an SO-101 arm and let a vision-language-action model do all the thinking on-board, with two cameras and a stack of servos. No cloud inference bill, no latency spike when the WiFi drops.
Two cameras and 50 demonstrations
The arm is the boring part. An SO-101 is a servo at every joint, the kind of kit that turns up in second-year robotics labs and thesis defences. The brain is where the work happened. Maslov fed the board video from an overhead camera plus a second camera on the gripper, added joint-position feedback, and trained Hugging Face’s SmolVLA model on roughly 50 demonstrations of the pick-and-place task. Fifty is a tiny dataset, and the arm still finds the ducks. The full build and video are on Hackster.
What is actually on the board
The VENTUNO Q keeps the split-brain layout that made the UNO Q popular: a microcontroller side and a single-board-computer side sharing one PCB. The MDB half runs an STM32H5F5, an Arm Cortex-M33 clocked at 250MHz, and that is the half you care about for servo timing, GPIO, and the pins you will actually solder to. The SBC half carries a Qualcomm Dragonwing IQ8 with a Kryo Gen 6 CPU, an Adreno 623 GPU, and a Hexagon Tensor NPU, plus 16GB of LPDDR5 and 64GB of eMMC.
That NPU is the reason local VLA inference is practical here rather than a slideshow. Arduino prices the board at $299. The nearest thing on the shelf is the Jetson Orin Nano Super Developer Kit at $399, which wins on some specs and loses on others, but does not hand you a Cortex-M33 on the same board.
Build it yourself
You do not need a $299 board to start. The path most students take looks like this:
- Get a 4-6 DOF servo arm moving first. An Arduino Uno plus a PCA9685 driver over I2C (SDA/SCL) is enough, and a separate 5V supply keeps servo current spikes off your logic rail.
- Record joint angles to serial while you drag the arm through a task by hand. That is your demonstration dataset, and it is the part everyone skips.
- Add one USB camera and a simple colour-blob detector before you reach for a neural network. If your gripper cannot close on a fixed target, a VLA model will not save it.
- Move to on-board inference only when the mechanical side is repeatable.
The tricky bit is never the model. It is servo backlash and a gripper that closes half a centimetre short. Fix the arm, then upgrade the brain.
Frequently Asked Questions
How does the robot arm know where the ducks are?
Two cameras feed it: one overhead and one mounted on the gripper. Those frames plus joint-position data go into Hugging Face’s SmolVLA vision-language-action model, which runs locally on the VENTUNO Q’s Hexagon NPU instead of calling out to a cloud service.
What does the hardware cost, and do I need the VENTUNO Q to try this?
The VENTUNO Q is $299 and the SO-101 arm is a separate servo kit. You do not need either to start. A servo arm driven by an Arduino Uno and a PCA9685 over I2C will teach you the mechanics for a fraction of that, and you can swap in a stronger brain once the arm moves repeatably.
What will I learn if I build this?
Servo control and PWM timing, I2C wiring with proper pull-ups, powering motors on a rail separate from your logic, and how to collect and label a demonstration dataset. On the software side you pick up camera calibration, coordinate frames, and the difference between real-time MCU work and heavier inference on an SBC. That split is exactly what embedded robotics and capstone projects test.
