
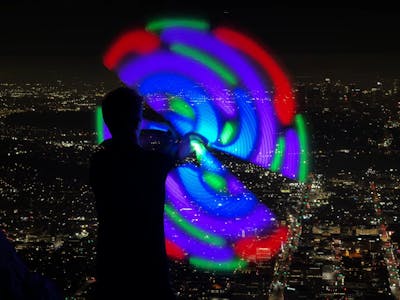
Spin a row of LEDs fast enough, flash them at exactly the right instant, and your eyes stop seeing dots and start seeing a picture hanging in mid-air. That is persistence of vision, and Corridor Crew’s Wren Weichman stretched the trick across a yard-long staff he swings by hand instead of a motor spinning it for him.
What he actually built
The staff carries a single line of individually addressable RGB LEDs running its full length, driven by a Teensy 4.1. Batteries sit at both ends so the weight balances and the pole swings like a proper performance prop rather than a lopsided broom. A second brain, an ESP32, handles the link to his phone, so animation patterns get swapped without cracking the tube open again.
Two problems that nearly killed it
A desktop PoV display spins its LED bar at roughly 2,000 RPM. No human arm gets a one-metre staff anywhere near that, so the image should smear into nothing. Weichman’s way around it was the camera, not the hardware: shooting long-exposure video at about a quarter-second per frame lets the sensor integrate the sweep even though your eye cannot.
Timing was the harder half. The Teensy has to know how fast the staff is travelling at every moment, because the same animation column drawn during a slow arc lands in a completely wrong place during a fast one. Hand-spinning is never as consistent as a motor, so an IMU rides along and reports rotation, and the firmware rescales the refresh from that live reading.
Build a small one first
You do not need a metre of pole to try this. A 60-LED WS2812B strip on one GPIO pin, an MPU6050 IMU on SDA/SCL with 4.7k pull-ups, and any 3.3V microcontroller you already own will show the effect on a 30cm dowel. Three gotchas worth knowing before you solder:
- WS2812B data wants 5V logic. A 3.3V board like the Teensy or an ESP32 usually works, but a level shifter on the data line stops the intermittent first-pixel flicker.
- Power budget honestly: 60 pixels at full white pull about 3.6A. Animations that stay under 30% brightness keep you inside a normal power bank.
- Read gyro rate, not accelerometer tilt. Angular velocity is the number your column timing actually depends on.
FastLED handles the pixel driving (github.com/FastLED/FastLED), and the full build write-up is on Hackster. Start by getting one solid vertical bar to hold still in a long-exposure photo before you attempt text.
Frequently Asked Questions
How does the staff know when to change the LEDs?
An IMU on board reports how fast the staff is rotating, and the Teensy 4.1 rescales its refresh timing from that live reading. Without it, hand-spinning at an uneven rate would smear the image, because the same animation column would land in a different spot on every pass.
What parts do I need for a smaller version?
What will I learn if I build this?
Timing-critical LED driving, reading a gyroscope over I2C, and the maths that turns angular velocity into a refresh rate. Those three skills transfer straight into robotics balancing, motor control and any project where sensor data has to change output timing in real time – useful groundwork for a thesis or a competition robot.
