
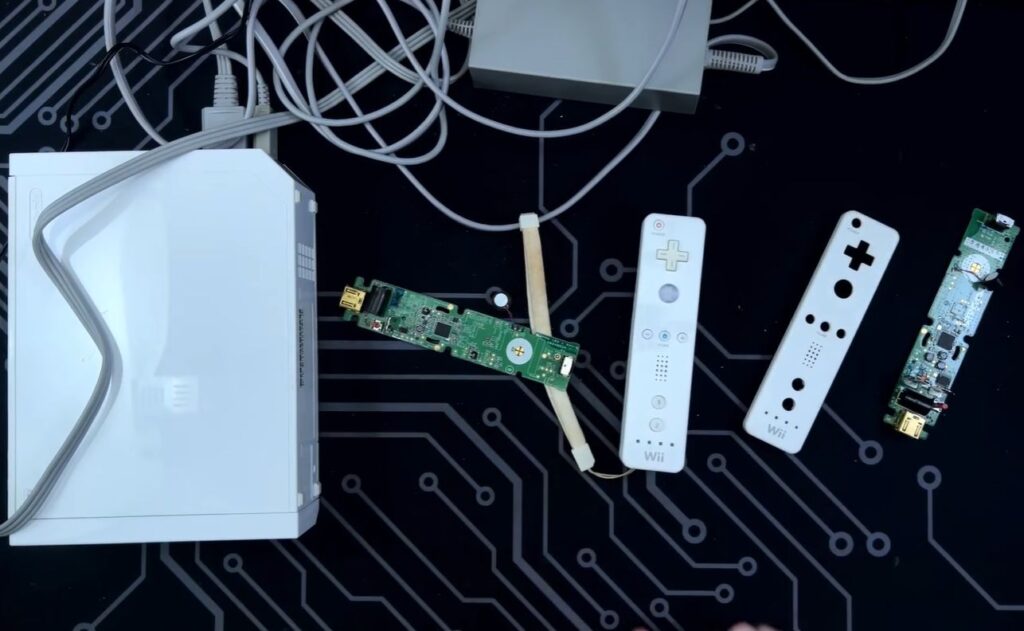
A bin of dead controllers is the cheapest electronics lab a student will ever get. [eWastelander] pulled three ruined WiiMotes out of an e-waste box, and turning them into one working unit covers battery-acid cleanup, PCB revision spotting and IC-level rework. Those are the same skills that keep lab equipment alive when a replacement part is six weeks out on a boat.
Three broken units, one target
All three had been stored with leaky alkaline cells still in them, so the 2xAA compartment and the traces underneath it took the worst damage. Bugs had moved into at least one shell. On one board the corrosion had eaten enough of the pads that an IC simply fell off. The boards also spanned two different hardware revisions, so part placement and test points did not line up between them and swapping components was never a straight one-for-one. After neutralising the residue, stripping everything down and cleaning it properly, one controller came back to life. The other two are still open questions.
What is actually inside a WiiMote
The original Wii Remote runs on 3V from two AA cells and handles Bluetooth through a Broadcom BCM2042. Motion sensing comes from an ADXL330 accelerometer with a ±3g range, and the dark window on the nose is a PixArt IR camera that tracks up to four IR sources at once. The expansion port at the bottom is plain I2C: a Nunchuk answers at address 0x52, and the pull-ups already sit on the remote side, so you can hang your own sensor off SDA and SCL with three wires and a breadboard. The gotcha with alkaline leakage is chemistry. The residue is potassium hydroxide, a base, so isopropyl alone will not neutralise it. White vinegar first, then IPA, then dry the board fully before any power goes near it.
Try it on your own bench
Grab any dead controller with an I2C expansion port and start there. A USB microscope, a fine-tip soldering iron, flux and some 30 AWG wire will cover most of this rework. If a board is beyond saving, the shell is still worth keeping: the OpenMote project drops an ESP32-S3 into a WiiMote housing so the buttons and rumble motor drive something else on your network, and the S3’s 240 MHz dual core with BLE 5 has far more headroom than the original silicon. Pin-level documentation for the accelerometer, IR camera and expansion bus lives on WiiBrew, and the full teardown is at Hackaday. Start with the vinegar, not the soldering iron.
Frequently Asked Questions
Why couldn’t the three WiiMote boards just swap parts one-for-one?
The three controllers spanned at least two hardware revisions. Component placement and test points differ between revisions, so a donor part from one board does not necessarily land on matching pads on another. Identify the revision before you plan a transplant.
What do I need to clean up alkaline battery corrosion safely?
Alkaline leakage is potassium hydroxide, a base, so isopropyl alcohol on its own will not neutralise it. Work through white vinegar first, then a rinse of 99% IPA, then a soft brush and full drying time. Add gloves, eye protection and ventilation. Only then power the board.
What will I learn if I try this repair?
You practise the core bench skills that no lab manual teaches well: reading corrosion damage, identifying board revisions, doing fine-pitch rework with flux and 30 AWG wire, and probing an I2C bus to confirm a device answers at its expected address. Those skills carry straight into thesis hardware and competition robots, where a dead board on Friday night has to be fixed, not replaced.
