
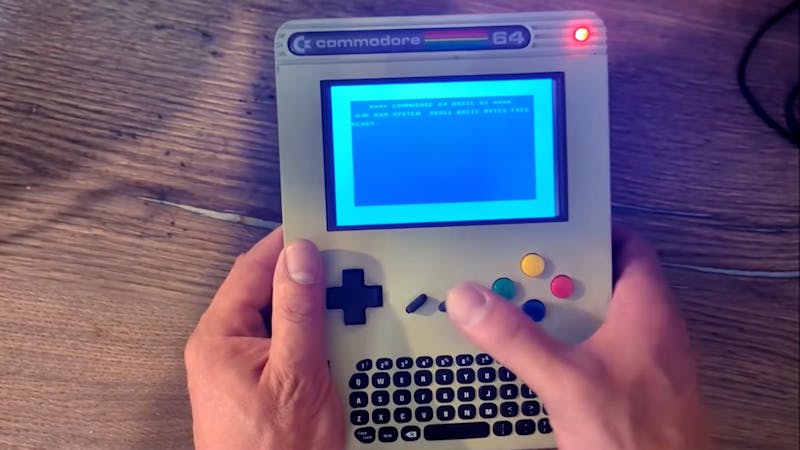
Want a Commodore 64 you can toss in a bag? Here is the shortlist before you start: a Raspberry Pi 3 Model B, a small HDMI display, a USB battery bank, a speaker paired with a tiny amplifier module, and a Raspberry Pi Pico to run the joystick ports. YouTuber Retro Dad pulled all of these off-the-shelf parts into one handheld, and the best news for beginners is that you can finish the wiring without ever touching a soldering iron.
What the build actually is
The C64 is still the best-selling single computer model ever made, more than four decades after its 1982 debut. This project keeps that experience alive in a pocket-friendly shell. A disassembled Xbox Chatpad PCB becomes the keyboard, talking back to the Pi through its own wireless dongle. A salvaged USB controller donates its D-pad and buttons, so you get real gaming controls sitting next to authentic Commodore joystick ports. Everything is open source: printable case files, wiring diagrams, and custom firmware are all published.
The technical trick with the joystick ports
Those old 9-pin D-sub joystick connectors were everywhere in the 1980s, but nothing modern speaks their language. Retro Dad’s fix was a Raspberry Pi Pico wired in as a translator, reading the joystick’s pin signals and converting them into USB input the Pi 3 understands. It is a tidy lesson in GPIO signaling: the Pico polls each pin, maps the direction and fire lines, then passes them along. Since the Pi runs on an Arm chip and not the original MOS 6502, the software side leans on the VICE emulator, which boots straight to that familiar blue flashing cursor.
Worth a weekend
Because every part is a plug-in module, assembly is genuinely solder-free, though the trade-off is bulk: this is a chunky handheld, not a slim one. Budget some time for wet-sanding and spray-painting the case if you want a clean finish. Full wiring notes and the bill of materials live on the project’s GitHub repo, linked from the original Hackster write-up. Pull a Pi 3 off the shelf, flash VICE onto a card, and you can be playing chiptune classics by Sunday.
Frequently Asked Questions
How does the handheld connect old Commodore joysticks?
A Raspberry Pi Pico acts as a translator. It reads the 9-pin D-sub joystick’s direction and fire signals, then converts them into USB input the Raspberry Pi 3 can understand.
Do I need to solder anything to build it?
No. Every component, including the Xbox Chatpad keyboard, the salvaged USB controller buttons, the display, and the battery bank, is a plug-in module, so the whole handheld can be assembled solder-free.
What will I learn if I build this?
You will practice GPIO signal handling with a Pi Pico, learn how emulators like VICE recreate legacy hardware, and pick up practical skills in wiring, power management, and enclosure finishing, all useful for wider embedded and robotics projects.
