
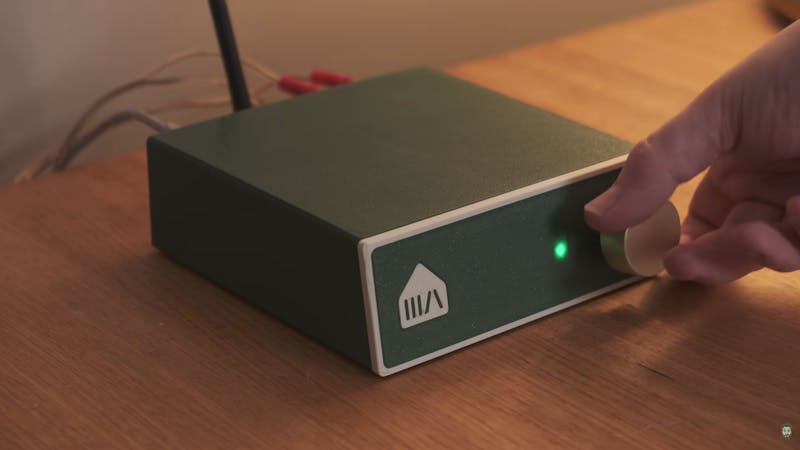
Multi-room audio used to be the clearest example of a problem you paid your way out of. A Sonos or WiiM setup gets music into three rooms with no fuss, and the bill lands somewhere north of PHP 40,000. Over the past two years that gap has narrowed from the maker side: cheap Wi-Fi SoCs with I2S audio built in, Class-D amp chips small enough to sit on the same PCB, and open-source playback stacks that keep rooms in sync without a subscription. A build by TmuWolverine, written up on Hackster, is a clean snapshot of where that trend has landed.
What the build actually is
The core is Sonocotta’s Louder ESP32 board, a $24 part that pairs an ESP32-S3 with a Texas Instruments Class-D amplifier. It puts out 23 W per channel in stereo, or 45 W bridged to mono, so Wi-Fi, audio decoding and speaker drive all live on one small board. TmuWolverine wrapped it in a custom enclosure with 11 M3 heat-set inserts, four 5-way binding posts on the rear for passive speakers, an SMA jack for an external antenna, and a KY-040 rotary encoder on the front wearing a brass furniture drawer pull instead of a plastic knob.
The technical bits worth stealing
Power is the part most people get wrong here. The board’s USB-C port only handles programming, so the build adds a USB-PD trigger board set to request 20 V from an ordinary laptop charger. That 20 V rail feeds the amplifier directly, and a small buck converter taps the same rail down to 5 V for a strip of WS2812B addressable LEDs sitting behind a translucent panel. The other gotcha: the Louder ESP32 exposes no GPIO header at all. TmuWolverine repurposed four unused pins from the board’s Ethernet connector to drive the LED strip, then patched the stock firmware to handle the encoder and the LED animations. Playback runs through Music Assistant under Home Assistant, with the Sendspin protocol keeping several units synchronized across rooms. The finished box drove a pair of 1978 Yamaha NS-692 three-way speakers to room-filling volume.
What to try next
You can test the idea without the Louder board: wire a PCM5102 I2S DAC to a plain ESP32 (BCK, LRCK and DIN on any three free GPIOs) and feed a small Class-D module. The audio path is the same, at lower power and roughly a fifth of the cost. Buck converters, WS2812B strips and KY-040 encoders are all on the shelf at Circuit.Rocks. One thing to plan for before you close up the case: if your speakers are 4 ohm rather than 8 ohm, check the amp’s thermal headroom first, because the TI part will throttle long before the 23 W figure means anything.
Frequently Asked Questions
Which board handles both Wi-Fi and amplification in this build?
How is the amplifier powered if its USB-C port is only for programming?
A separate USB-PD trigger board negotiates 20 V from a standard USB-C laptop charger and feeds that straight to the amplifier. A small buck converter taps the same 20 V rail and drops it to 5 V for the WS2812B LED strip, so the whole unit runs off one charger instead of a dedicated power brick.
What will I learn if I build this?
You will get hands-on with I2S digital audio, USB-PD power negotiation, and buck conversion between rails in the same project, plus practical GPIO scavenging when a board gives you no header. On the software side you touch ESP32 firmware modification, addressable LED timing, and integrating a device into Home Assistant over the network. That mix of power electronics, embedded C and IoT integration maps directly onto ECE thesis and capstone work.
