
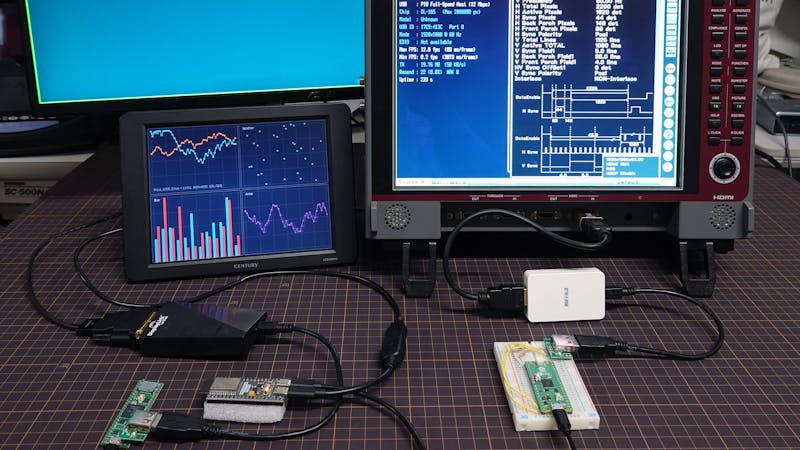
Here is a weekend build that sounds impossible until you wire it up: pushing a real 1920×1080 desktop at 60Hz out of a chip that was never meant to draw more than a blinking LED. A developer going by htlabnet released a library that does exactly that, turning a Raspberry Pi Pico or an ESP32 into a full-HD video source over plain USB. Clear a Saturday afternoon and you can have GUI graphics on a real monitor by dinner.
What the build actually does
Microcontrollers have driven seven-segment displays and small OLEDs for years, and hackers have squeezed composite, VGA, and DVI signals out of them before. This approach skips all that. The library sets the board up as a USB host and hands pixel data to an off-the-shelf USB display adapter. The adapter generates the video signal itself, so the Pico or ESP32 never has to do the brutal timing work that video normally demands. Think of it as writing to a frame buffer that happens to live on the far end of a USB cable. Wiring is only two data wires.
Parts and cost reality
The code runs on a wide spread of boards: the RP2040-based Pico, the RP2350-based Pico 2, ESP32-S2, ESP32-S3, and ESP32-P4 boards, or a Teensy 4.x. Check one thing first: the ESP32 boards need a USB OTG connector, while the RP2040, RP2350, and Teensy boards need a USB host connector. The other half of the setup is the display adapter. htlabnet tested roughly 20 adapter chips and published which boards and resolutions each one supports. For the fewest headaches, aim for a DisplayLink DL-165, sold inside the WAVLINK WL-UG17D1 dongle, which turns up on eBay for around $20. Builds ship for both the Arduino IDE and ESP-IDF.
Spend your Sunday on this
If you have a spare Pico sitting in a drawer, this is a cheap way to give any project a genuine monitor output instead of a cramped 128×64 OLED. Start with the compatibility list, grab a matching adapter, then follow the Library Usage Guide for code samples across different graphics libraries. The full write-up and the chip list live on the Hackster project page. Pick your board, order the $20 dongle this week, and you will have a full-HD dashboard running before Monday.
Frequently Asked Questions
How does a Pico output full-HD video without a GPU?
Which USB display adapter should I buy for this?
htlabnet tested about 20 adapter chips. The safest pick is a DisplayLink DL-165, found in the WAVLINK WL-UG17D1 dongle for roughly $20 on eBay. Check the project compatibility list to match the adapter to your specific board and target resolution.
