
What if a rhythm game had no beatmap at all, and simply listened to whatever song was playing in the room?
The answer is Beat Dash
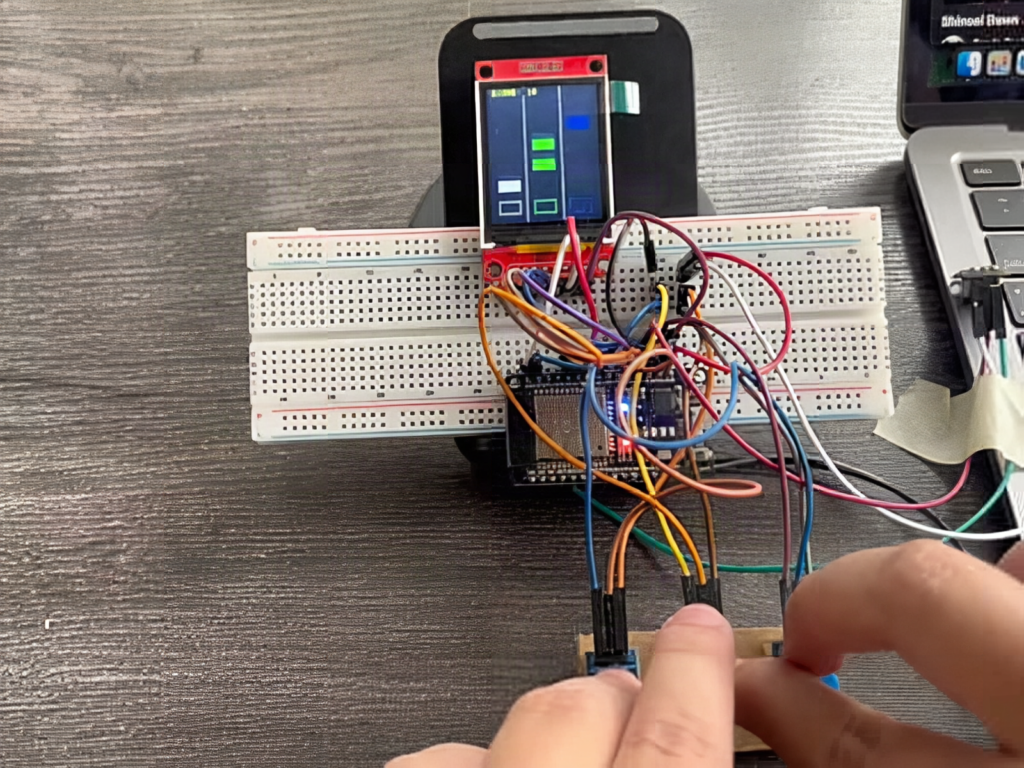
Maker Barqunics built a palm-sized Guitar Hero clone called Beat Dash and documented it on Hackster, with a write-up picked up by the Adafruit blog. The brain is a plain ESP32 dev board. The screen is a 1.8-inch ST7735 colour TFT, 128×160 pixels, talking over SPI. The ear is a GY-MAX4466 module: an electret microphone with a MAX4466 amplifier behind it, adjustable gain from about 25x to 125x via a tiny trim pot on the back. Three push-button modules sit under the screen as lane controls, and the whole thing lives on a breadboard with a small arcade-style controller built around it. There is no stored note chart. The microphone listens, and every time the sound level spikes past a set threshold, the firmware spawns a falling note in one of three lanes. Play a different track and you get a different chart, live.
How does the beat detection actually work?
The MAX4466 outputs an analogue waveform centred near half its supply, so on a 3.3 V ESP32 the idle level sits around 1.65 V. The ESP32 reads that with its 12-bit ADC, giving values from 0 to 4095, roughly 2048 at rest. The game logic samples the pin fast, tracks how far each reading swings from the centre, and compares the peak against a threshold. Cross it, and a note drops. Two gotchas matter here. Use an ADC1 pin such as GPIO34 or GPIO35 for the mic, because ADC2 pins stop working the moment Wi-Fi is enabled. And keep the gain modest: crank the trim pot too high and ambient noise triggers notes on every bass hum. The display is the easy half. A standard DevKit wiring puts SCK on GPIO18, MOSI on GPIO23, with CS, DC and RST on any free outputs, driven by the Adafruit_ST7735 library or TFT_eSPI at a comfortable 27 MHz. Buttons go to digital inputs with the internal pull-ups turned on, so a press reads LOW and you skip three external resistors. The dual-core 240 MHz ESP32 has plenty of headroom to redraw falling notes and poll the ADC at the same time; the trick is only redrawing the lanes that changed, since a full 128×160 refresh over SPI is where the frame rate goes to die.
Try it this week
Parts: an ESP32 dev board (this 30-pin CH9102 board at circuit.rocks works), a 1.8-inch ST7735 TFT (Adafruit’s is product 3269), a MAX4466 mic breakout or the GY-MAX4466 clone, three tactile buttons, a breadboard and jumper wires. Flash a sketch that just prints the raw ADC value to Serial first, play music, and watch the numbers to pick your threshold. For a thesis or school demo, swap the fixed threshold for a rolling average so the game adapts to loud and quiet songs; that one change is worth an extra chapter.
Frequently Asked Questions
How does Beat Dash generate notes without a stored beatmap?
A GY-MAX4466 microphone amplifier feeds an analogue signal into the ESP32‘s 12-bit ADC. The firmware watches how far each reading swings from the resting level (about 2048) and, when a peak crosses a set threshold, spawns a falling note in one of three lanes. The chart therefore follows whatever music is playing in the room.
What parts and skills do I need to build it?
An ESP32 dev board, a 1.8-inch 128×160 ST7735 SPI TFT, a MAX4466 mic module, three push buttons, a breadboard and jumper wires. You need basic Arduino IDE experience, comfort wiring an SPI display, and patience to tune the mic gain and threshold. No soldering is required for the breadboard version.
What will I learn if I build this?
Reading analogue audio with the ESP32 ADC and the ADC1 versus ADC2 Wi-Fi gotcha, simple peak and threshold signal detection, driving an SPI colour display efficiently with partial redraws, debouncing buttons with internal pull-ups, and structuring a real-time game loop on a microcontroller. It is a compact introduction to embedded signal processing and graphics.
