
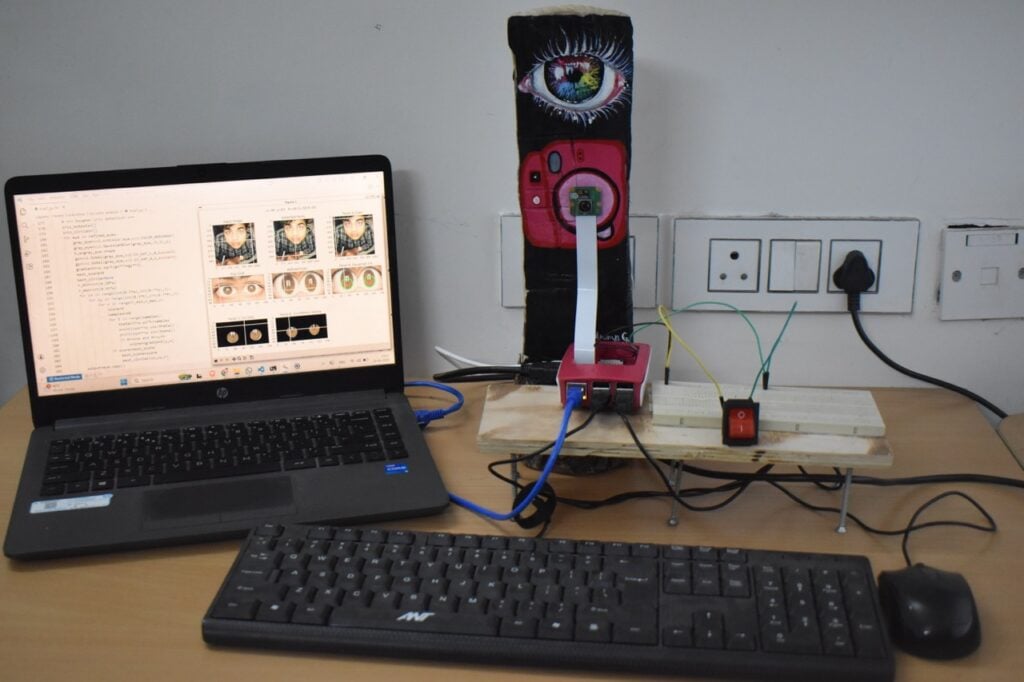
A single push button, a camera, and a free Saturday are enough to build something that reads the colour of your eye and files it into one of seven categories. That is what Srikrishna Karthick put together for a National Science Day exhibit at IISER Tirupati in India, and the whole rig runs on a Raspberry Pi 3 Model B+ that most of us already have sitting in a drawer.
What the exhibit actually does
The Muscle Physiology Laboratory there displays fruit flies with different eye-colour phenotypes to show how eye colour is inherited. Recording the eye colours of visitors made the display personal, but a manual tally would have been slow and easy to get wrong. So: press the button wired to the Pi’s GPIO header, the Camera Module 3 grabs a frame, and OpenCV takes it from there. The running distribution appears on screen as a histogram, so each visitor sees where they land among everyone who walked past that day.
The image pipeline, step by step
Haar cascade classifiers find the face first, then narrow down to the eye region. A Daugman-inspired circular gradient search estimates the iris boundary, the same class of algorithm behind commercial iris recognition. Pixels inside that circle are kept, and the sclera is stripped out with brightness and saturation filtering. K-means clustering then runs across both RGB and HSV feature spaces, the largest cluster wins, and predefined HSV threshold ranges sort the result into dark brown, brown, light brown, blue, green, amber, or grey. A reference implementation of the localisation step sits on GitHub if you want to read the maths.
Parts and cost reality
- Raspberry Pi 3 Model B+, though a Pi 4 or Pi 5 will chew through the clustering faster
- Camera Module 3, 12MP with autofocus. Autofocus earns its keep here, because the iris is small in frame
- One momentary push button on a spare GPIO pin, with the internal pull-up enabled in software so you can skip the resistor
- A ribbon cable, a breadboard, and lighting that does not throw a specular highlight across the pupil
Nothing needs soldering. This was Srikrishna’s first Raspberry Pi build, delivered on a one-week deadline, and the exhibit then ran for roughly 350 visitors without a crash or a thermal throttle.
Spend your Sunday on this
Point the same skeleton at a different target and it counts plant leaf colour, paint batches, or LED output on a test jig. The tricky half is localisation, not classification. Start by getting Haar cascade eye detection working on a saved photo before you connect the camera at all, because that separates your OpenCV bugs from your hardware bugs. The full write-up is at raspberrypi.com.
Frequently Asked Questions
How does the Raspberry Pi work out which colour an iris is?
OpenCV Haar cascades locate the face and eyes, a Daugman-inspired circular gradient search finds the iris boundary, and brightness and saturation filtering removes the sclera. K-means clustering on the remaining pixels in RGB and HSV space picks a dominant colour, which is then matched against HSV threshold ranges for dark brown, brown, light brown, blue, green, amber, or grey.
What parts do I need, and is any soldering involved?
A Raspberry Pi 3 Model B+ or newer, a Camera Module 3 with its ribbon cable, one momentary push button on a GPIO pin, and a breadboard. No soldering. Enable the internal pull-up on the button pin in software and you do not even need an external resistor. Consistent lighting matters more than any of the hardware choices.
What will I learn if I build this?
You get hands-on practice with GPIO input handling, camera capture on the Pi, and a full classical computer vision pipeline: cascade detection, region-of-interest cropping, colour-space conversion between RGB and HSV, and k-means clustering. Those steps transfer directly to thesis and capstone work in image processing, and the button-triggered capture pattern is the same one you would use for any sensor-triggered data logger.
