
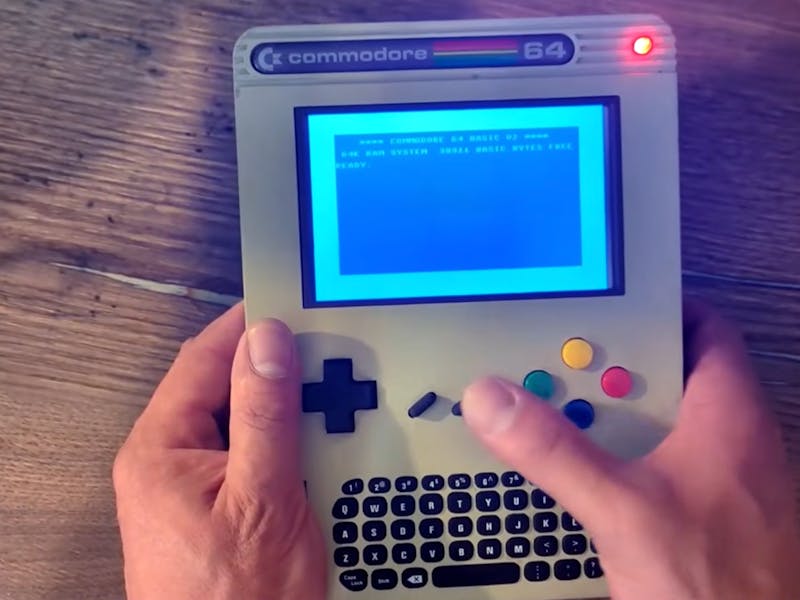
Got a spare Raspberry Pi 3 and a free Saturday? YouTuber Retro Dad turned exactly that into a handheld Commodore 64 you can pull out of a backpack and play anywhere. The C64 is still the best-selling single computer model ever made, and more than 40 years after its launch people keep finding new ways to carry it around. This is one of the tidiest we have seen, and the whole thing is open source.
What Retro Dad actually built
The brain is a Raspberry Pi 3 Model B running the VICE emulator, set to boot straight into C64 mode so there is no desktop to fuss with. Since the Pi runs on an Arm chip and not the original 6502, real C64 cartridges will not work, but VICE gets you close enough that you stop noticing. For the keyboard, an Xbox Chatpad was cracked open and its bare PCB dropped into the case, talking to the Pi over its own wireless dongle. A small HDMI screen, a speaker, and an amplifier module handle picture and chiptune audio, all fed by a USB power bank.
The parts reality
The clever bit is the joystick port. Those 9-pin D-sub connectors ruled 1980s and 1990s machines but are rare now, so Retro Dad wired in a Raspberry Pi Pico as a translator, converting the old joystick signals into something the Pi can read. Prefer to travel light? A salvaged USB controller donates the onboard D-pad and buttons instead. Because everything is off-the-shelf, you will not touch a soldering iron for this build, though the trade-off is bulk. It is a chunky little slab, not a pocket device. Budget for the Pi 3, a Pico, an HDMI display, a Chatpad, an amp module, and a battery bank.
Spend your Sunday on this one
Retro Dad published the printable case files, custom firmware, wiring diagrams, and a full build guide, so you are not reverse-engineering anything. Start by flashing VICE onto the Pi and confirming it boots into C64 mode before you commit to the case, then wire the Pico last since the D-sub translation is the fiddliest part. If your keyboard drops out, re-pair the Chatpad dongle before you blame the wiring. Full write-up and files are on the Hackster build page.
Frequently Asked Questions
How does the handheld run Commodore 64 games?
It uses a Raspberry Pi 3 Model B running the VICE emulator, set to boot straight into C64 mode. The Pi’s Arm chip can’t run original 6502 cartridges, but VICE reproduces the C64 experience faithfully.
Do you need to solder anything to build it?
No. Every part is off-the-shelf: an Xbox Chatpad PCB for the keyboard, a Raspberry Pi Pico to translate 9-pin D-sub joystick signals, an HDMI screen, a speaker with an amp module, and a USB battery bank. The trade-off is a chunky enclosure.
What will I learn if I build this?
You’ll practice flashing and configuring an emulator on a Raspberry Pi, using a Pico microcontroller to bridge legacy 9-pin signals into a modern board, and wiring audio and display modules into a single powered enclosure. Solid microcontroller and system-integration skills for a capstone or robotics-team member.
