
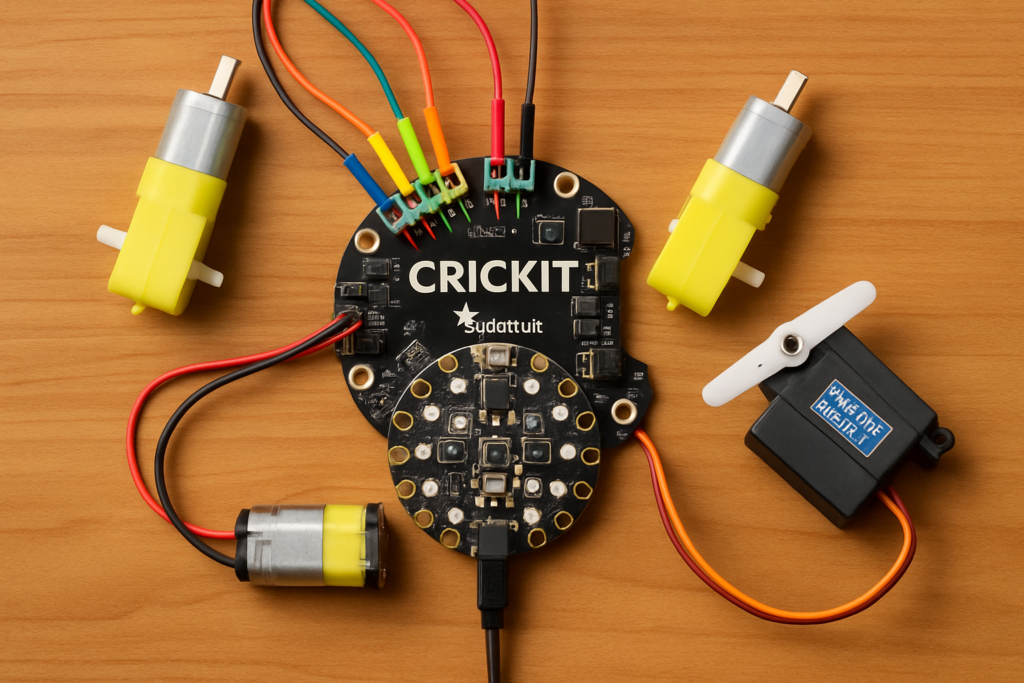
What you’ll need to get a robot moving
Grab a CRICKIT board, a Circuit Playground Express or any Feather, four AA batteries or a 5V supply, and a couple of hobby DC motors or micro servos. That short list is enough to build a line-following buggy, a wobbly walking bot, or a sensor-triggered desk toy. CRICKIT (Creative Robotics and Interactive Construction Kit) is the part that turns a bare microcontroller into something that can push, spin, and light up without a breadboard full of driver chips.
What the board actually does
CRICKIT stacks onto boards a lot of students already own. There are versions for the Circuit Playground Express, for any Feather, and a HAT that bolts onto a Raspberry Pi. It talks to the host over I2C using Adafruit’s seesaw co-processor, so the heavy motor switching happens on the CRICKIT itself and your main chip stays free for program logic. You can write for it in CircuitPython, MakeCode, or Arduino, which means a Grade 7 class and a college capstone team can share the exact same hardware.
The specs that decide your build
One CRICKIT drives up to 4 DC motors or 2 stepper motors, 4 standard servos, and 4 capacitive-touch inputs, plus a NeoPixel output and a small onboard speaker driver for beeps and sound effects. The motor channels push about 1A each at 5V, which is fine for TT gearmotors and a small robot arm but not for a power drill. Wiring uses solderless spring terminals, so students clamp motor leads straight in with no soldering iron. In code, driving a motor is two lines: import the crickit object, then set crickit.dc_motor_1.throttle = 0.5. A bumper switch is just crickit.touch_1.value on touch pad 1.
Where to start
Flash CircuitPython onto your host board, drop the seesaw and CRICKIT libraries into the lib folder, and copy a demo script from the Adafruit Learning System at https://learn.adafruit.com/adafruit-crickit-creative-robotic-interactive-construction-kit. Run a single servo sweep first, confirm the board answers on I2C, then add a motor. If nothing moves, check that the CRICKIT has its own battery pack connected, because it will not turn motors off USB power alone.
Frequently Asked Questions
How many motors can one CRICKIT control?
A single CRICKIT drives up to 4 DC motors or 2 stepper motors at about 1A per channel, plus 4 standard servos, so you can run a full buggy or a small robot arm from one board.
Do I need to solder anything to use CRICKIT?
No. Motor and sensor connections use solderless spring terminals, so you clamp leads straight in. It stacks onto a Circuit Playground Express or Feather, or bolts on as a Raspberry Pi HAT, and talks over I2C via the seesaw co-processor.
What will I learn if I build this?
You’ll practice wiring DC motors and servos, reading capacitive-touch sensors as inputs, and writing CircuitPython to control them over I2C. Those are the same motor-driver and sensor skills you’ll reuse in robotics competitions and thesis builds.
