
Clear the dining table on Saturday morning and by Sunday night a Raspberry Pi 5 can be booting straight into a menu of NES, Mega Drive, and PlayStation games. Retro emulation is still the most popular use for a Pi, and the Raspberry Pi team just rounded up the hardware that turns a bare board into something that feels like a console. The software side is free (RetroPie, Recalbox, Lakka, or Batocera), so the weekend is really about choosing a case, a controller, and a screen.
What the roundup covers
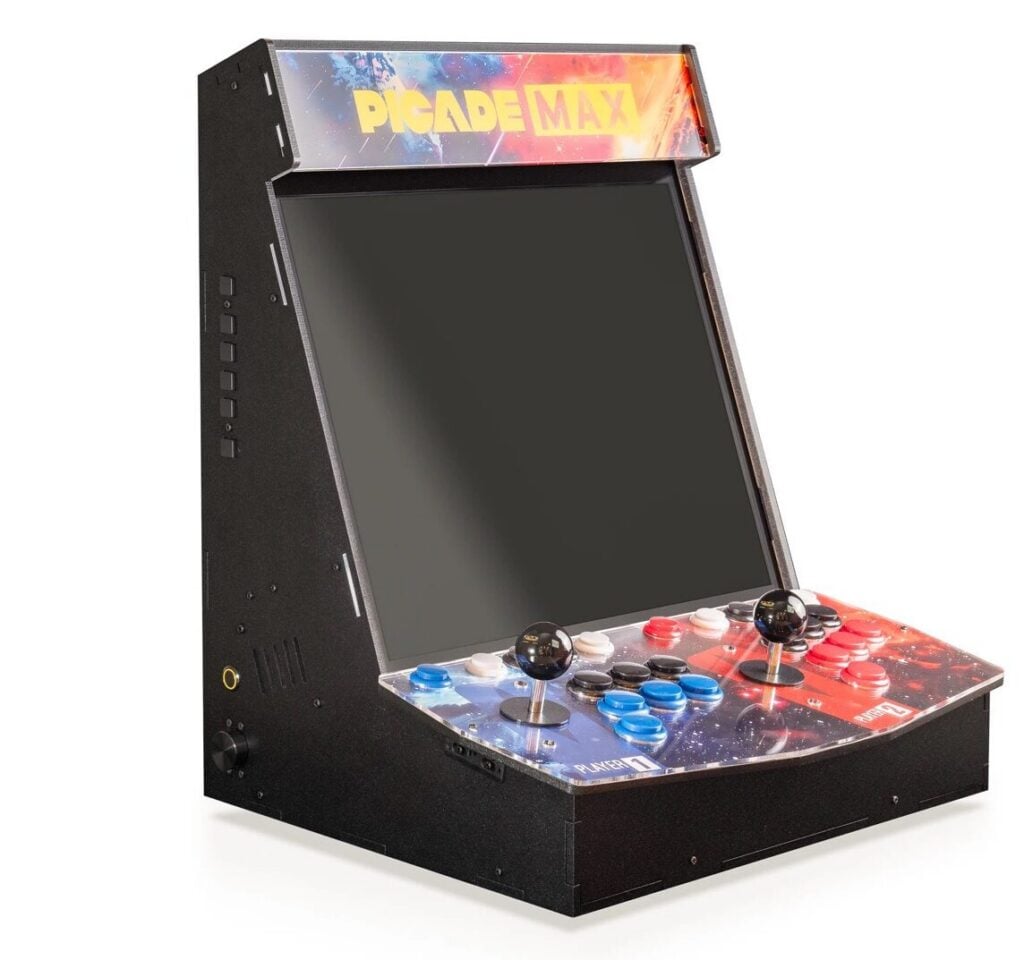
The headline piece is Pimoroni’s Picade MAX, a two-player bartop cabinet with a 19-inch IPS panel at 1280 x 1024, the proper 5:4 arcade ratio. The joysticks and buttons feed an RP2040-based USB controller board, so input lag is close to zero, and a second RP2040 audio board drives the cabinet speakers through a real rotary volume knob. NVMe SSD storage, RGB-lit buttons, and a Galactic Unicorn LED marquee are the official upgrades. Also on the list: the Game 5Pi case shaped like a shrunken NES, with two fans and thermal pads to keep the Pi 5 cool; a 2.4 GHz wireless gamepad that uses a USB dongle instead of Bluetooth, so there is no pairing step; and Recalbox’s RGB Dual 2, a HAT that sits on the Pi 5‘s 40-pin GPIO header and outputs SCART, composite, VGA, and 3.5 mm audio for a real CRT television. Four DIP switches on that board force 50 Hz or 31 kHz multisync modes.
Parts and cost reality
Honest numbers first. The Picade MAX is a £495 / $549 kit before you add the Pi 5, so that one is a robotics-club budget item or a thesis exhibit, not a casual weekend buy. The cheaper path is a Raspberry Pi 5 (4 GB handles anything up to PS1), the Game 5Pi case at about $23, the wireless gamepad at $19, a 32 GB microSD card, and whatever HDMI TV you already own. That lands near PHP 8,000 to 9,000 all in. If you only have a Pico or Pico 2 on the bench, the Pico VGA Demo Base at $22 adds a VGA connector, a microSD slot, and two 3.5 mm audio jacks, and you can flash the RP2040 Doom port from github.com/kilograham/rp2040-doom as a UF2 file. pico-zxspectrum ships precompiled UF2s for the same board. One gotcha with any Pi 5 build: the SoC throttles at 85 °C, so a fanless case will stutter mid-session.
Spend your Sunday on this
Saturday: write Recalbox or Batocera to the microSD with Raspberry Pi Imager, assemble the case, and map the gamepad buttons inside the front-end. Sunday: load legal ROMs. Homebrew titles for the NES, Mega Drive, and ZX Spectrum are free, and the Raspberry Pi magazine keeps a list of sources. For the CRT look without a CRT, switch on a scanline shader in RetroArch and set integer scaling. The complete roundup, including the £19.99 Retro Gaming guide book, is at raspberrypi.com.
Frequently Asked Questions
Which emulation OS should I pick for a Raspberry Pi 5 retro build?
Recalbox and Batocera boot straight into a full-screen game menu with no Linux desktop, which makes them the easiest first build. RetroPie runs on top of Raspberry Pi OS and is simpler to tweak over SSH. Lakka is a bare RetroArch image. All four are free; Batocera and Recalbox currently have the smoothest Pi 5 support.
Do I need the Picade MAX, or can I build a cheaper arcade cabinet?
The $549 kit buys the 19-inch screen and a finished two-player enclosure. Pimoroni sells the RP2040 controller board and audio board separately, so you can wire your own joysticks and arcade buttons to one of those (or an original Picade X HAT) and cut the cabinet from plywood. A Pi 5, the Game 5Pi case, and a wireless gamepad come in under PHP 9,000 if you just want a console.
What will I learn if I build this?
Flashing an OS image and navigating a Linux file system over SSH, mapping USB HID controllers, how GPIO HATs like the RGB Dual 2 generate analogue video (SCART and composite timing, 50 Hz versus 60 Hz), and thermal management on a Pi 5. Take the Pico VGA route and you also get hands-on with UF2 firmware and how an RP2040 bit-bangs a VGA signal with its PIO state machines.
