
Imagine cracking open your laptop to fix a wobbly hinge or upgrade your storage—and finding zero glue, no proprietary connectors, and parts you can actually buy off the shelf. That’s the machine YouTuber Jankbu set out to build, and the result is one of the most thoughtful cyberdecks we’ve seen this year.
Frustrated by warranty stickers and disposable hardware, Jankbu went the other direction: a fully modular portable computer designed from day one to be repaired, upgraded, and tinkered with. Every subsystem can be popped off or swapped out, which makes the build feel less like a sealed gadget and more like a workshop you can tuck under your arm.
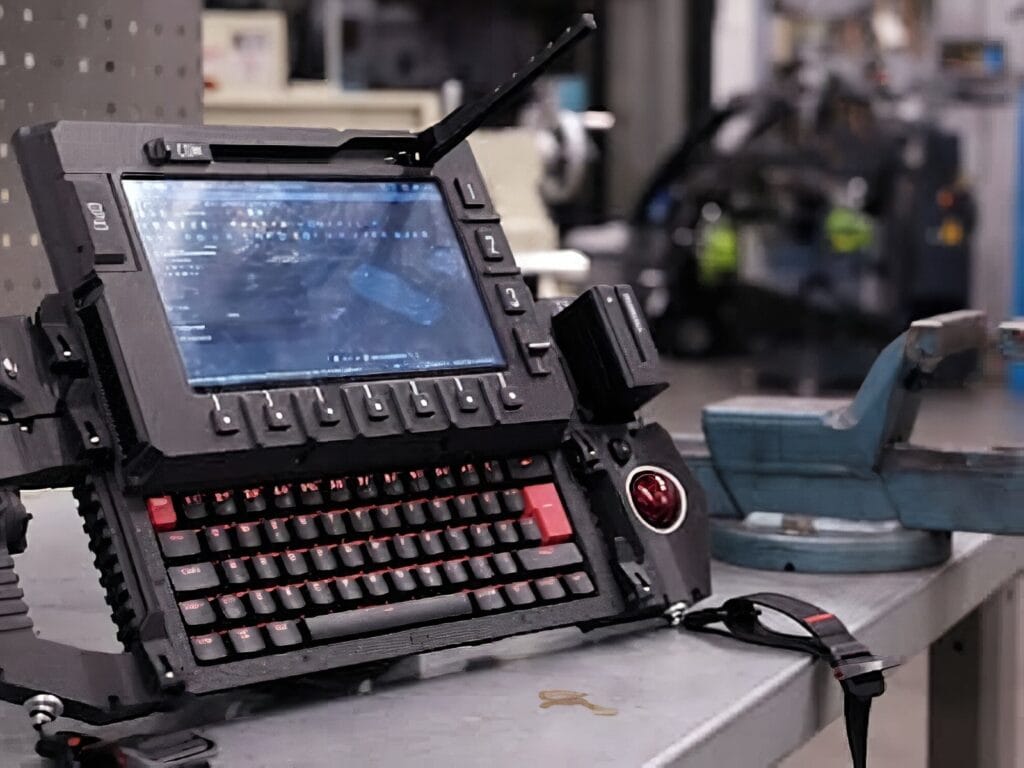
The cyberdeck skips the traditional clamshell hinge in favor of a vertically sliding display, giving it a silhouette that’s part terminal, part field laptop. It’s the kind of project that reminds you computers used to ship with circuit diagrams—and that, with enough patience, they still can.
Inside the build
At its core is a Raspberry Pi 5 running Linux, aimed at web browsing and CAD work. The chassis uses a NATO rail system so modules clip on and off without tools. A removable power unit accepts hot-swappable NPF camera batteries and shows live voltage right on the front. The trackball pod borrows the electronics from a Logitech Trackman Marble, wired in alongside large industrial-style buttons for workshop use. The sliding screen rides on steel rods and linear bearings instead of a hinge, with a miniature CNC-style cable chain keeping the display ribbon from snagging during travel.
Construction followed a classic iterative path: cardboard mockups first, then rough plastic prints, with the final parts printed in carbon-fiber-infused polycarbonate. The carrying handle and trackball mounts were machined from solid aluminum to handle the load.
Build it yourself
Want to try a version of your own? Start with a Raspberry Pi 5 as the brain. Grab NPF camera batteries and a matching charging board for the power module, and source linear bearings plus steel rods for the slide mechanism. A donor Logitech Trackman Marble handles the pointer, and large arcade-style buttons cover the rest of the controls. Carbon-fiber PC filament is overkill for a first prototype—standard PETG will get you to a working draft. Find Raspberry Pi 5 boards, 3D printer filament, and project hardware at Circuit.Rocks.
Frequently Asked Questions
What hardware powers this Raspberry Pi cyberdeck?
It’s built around a Raspberry Pi 5 running Linux, with hot-swappable NPF camera batteries, a NATO rail mounting system, a sliding display on steel rods and linear bearings, and a trackball pod salvaged from a Logitech Trackman Marble.
How does the vertical sliding screen work without a hinge?
The display rides on steel rods and linear bearings, sliding down to cover the keyboard when not in use. A miniature CNC-style cable chain keeps the display ribbon from snagging or kinking as the screen travels.
What will I learn if I build this?
You’ll pick up CAD design, 3D printing in advanced filaments like carbon-fiber polycarbonate, Linux setup on a Raspberry Pi 5, soldering and rewiring salvaged electronics, and mechanical design with linear bearings and modular rail systems—skills that transfer to robotics, drones, and custom PC builds.